Wednesday, April 17, 2013
No Longer Have the Customline
I have been getting a lot of questions asking why I haven't updated the blog with new info on my build. I wont get into any details but went through a divorce and lost the car in it. So unless I get another Customeline this Blog is pretty dead and I apologize. I will keep the info I have up here for you Customline builders looking for info.
Monday, June 6, 2011
Door Latch Fix for Shaved Doors
This isn't something I have done but liked the write up and asked if I could pass it along to you. So the credit goes to dragonknucks and sickboymesa over at the HAMB.
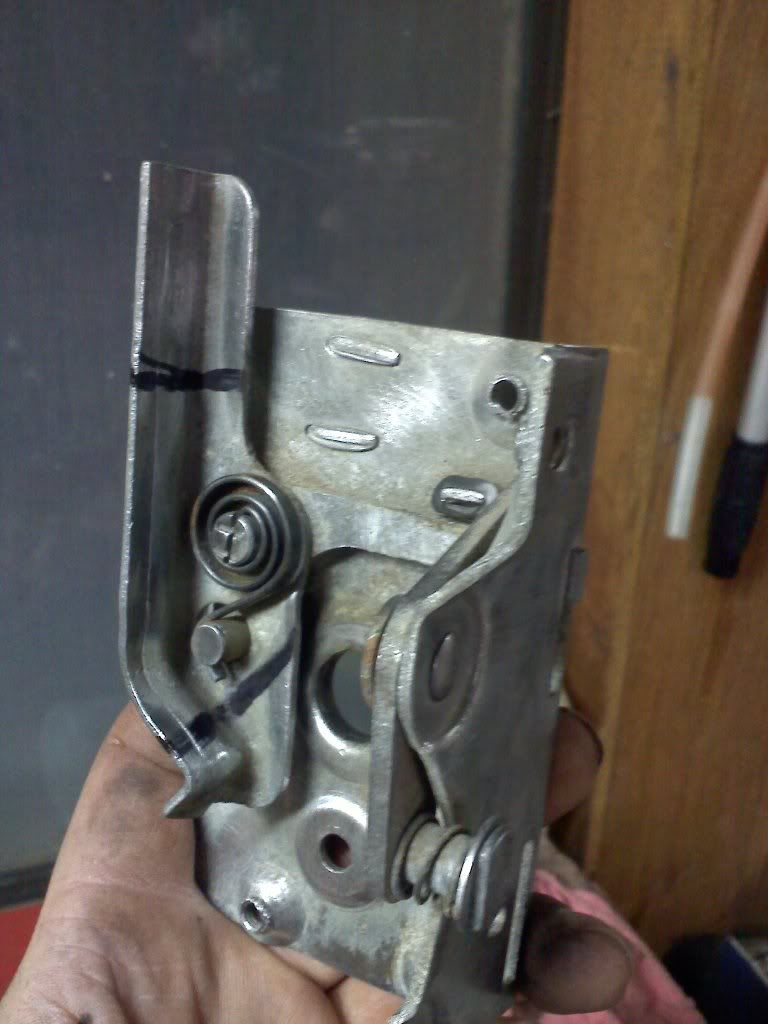
We have come up with a way to rebuild the door latches/mechanisms for shaved handles. This also helps minimize the slack that is in the star.
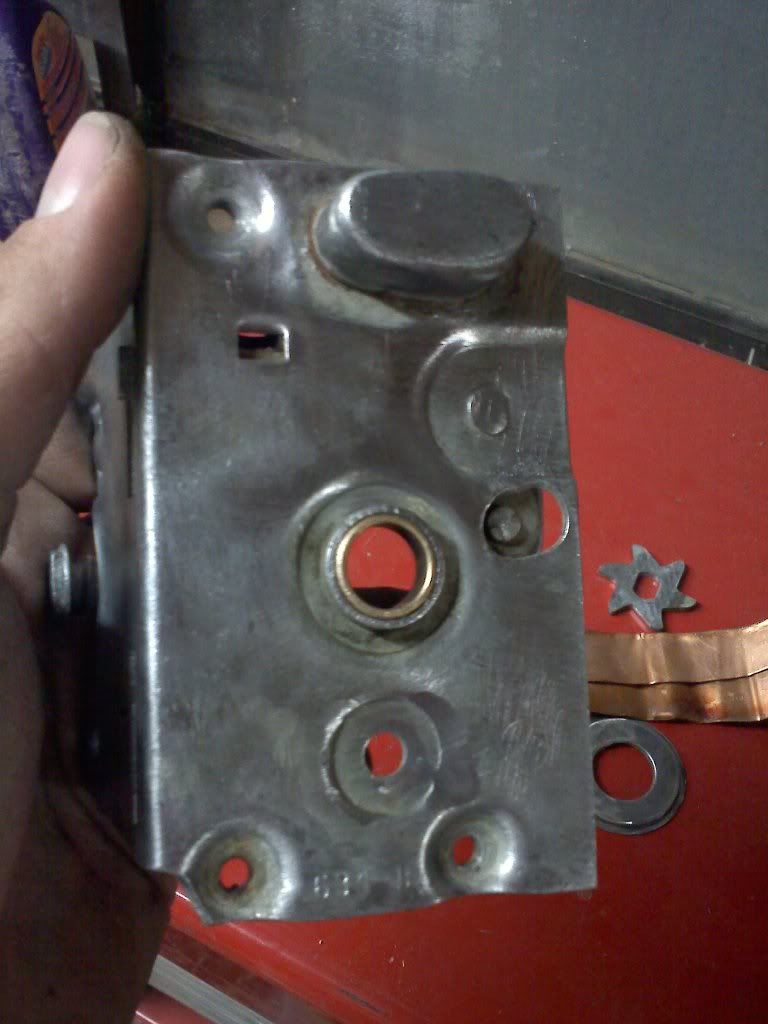
The first step is to grind down the rivets and knock them out.
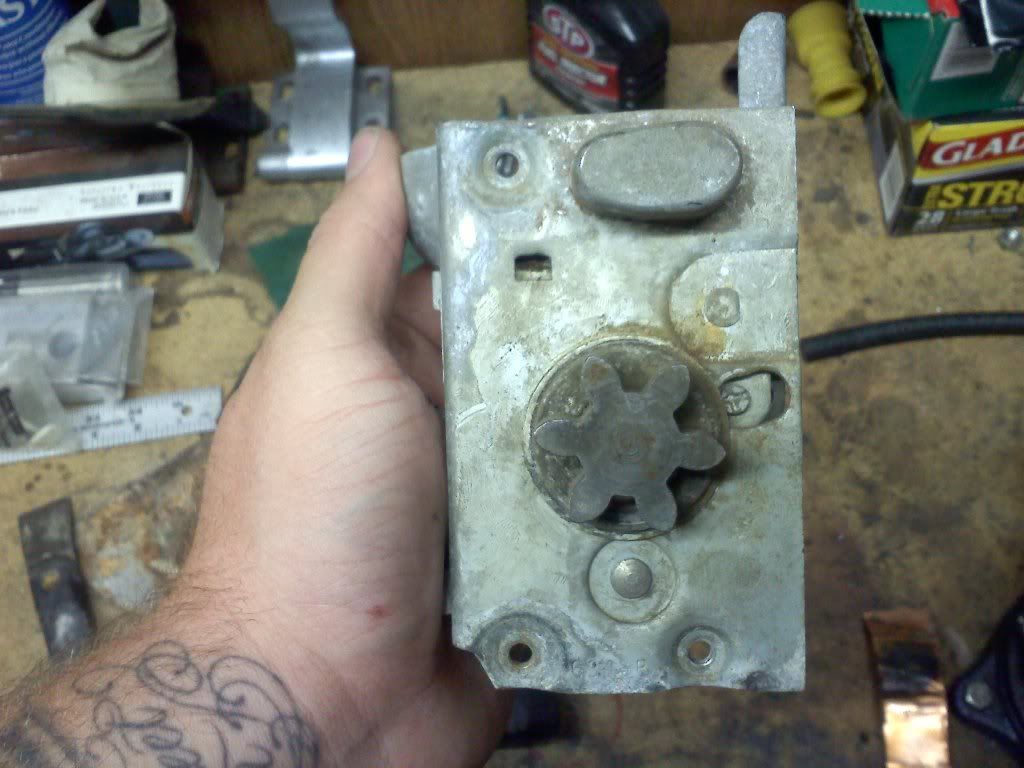
Grind out the one just below the star. Also grind out the one on the right side in this picture.
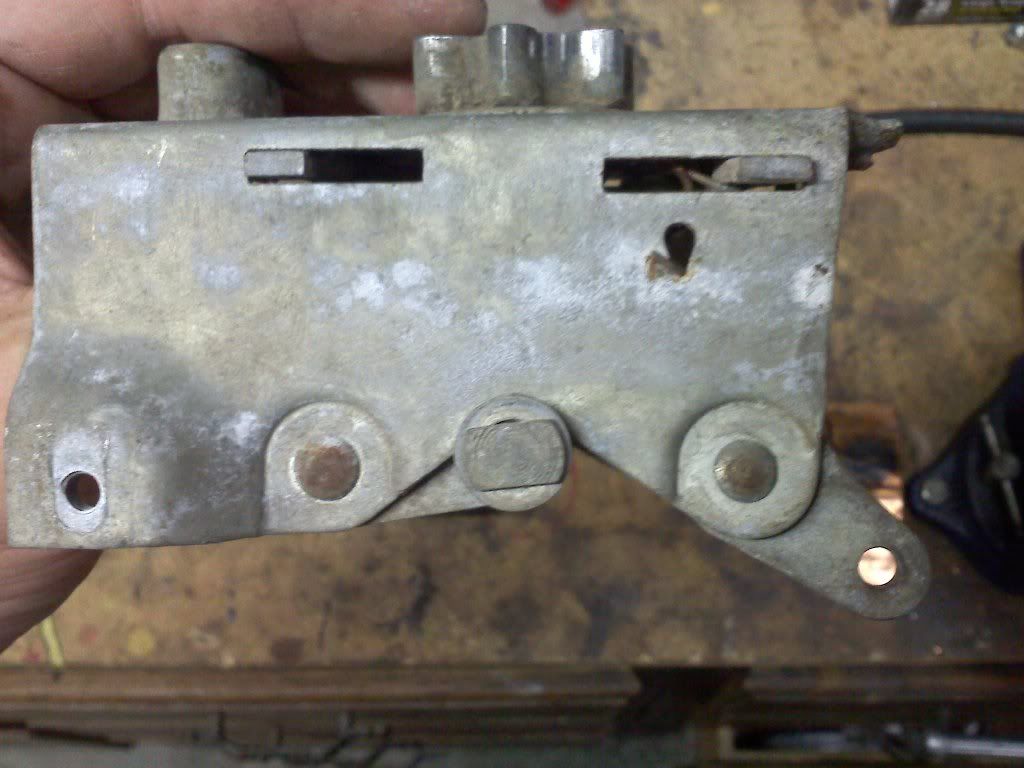
Punch out the rivets and this is what you are left with.
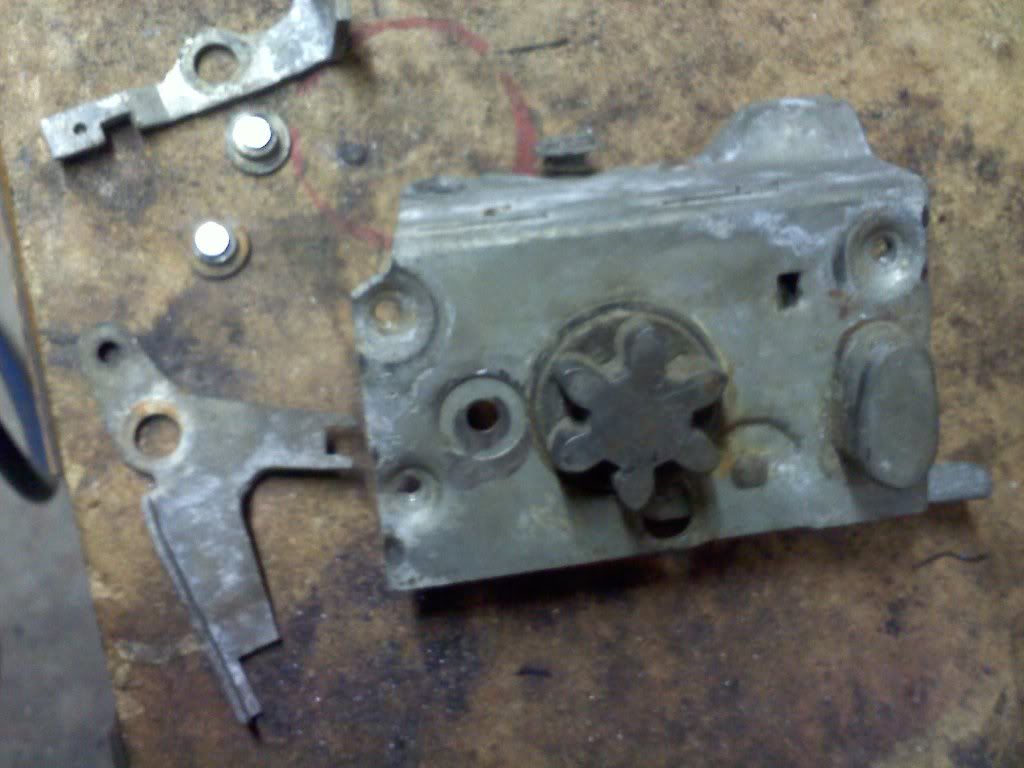
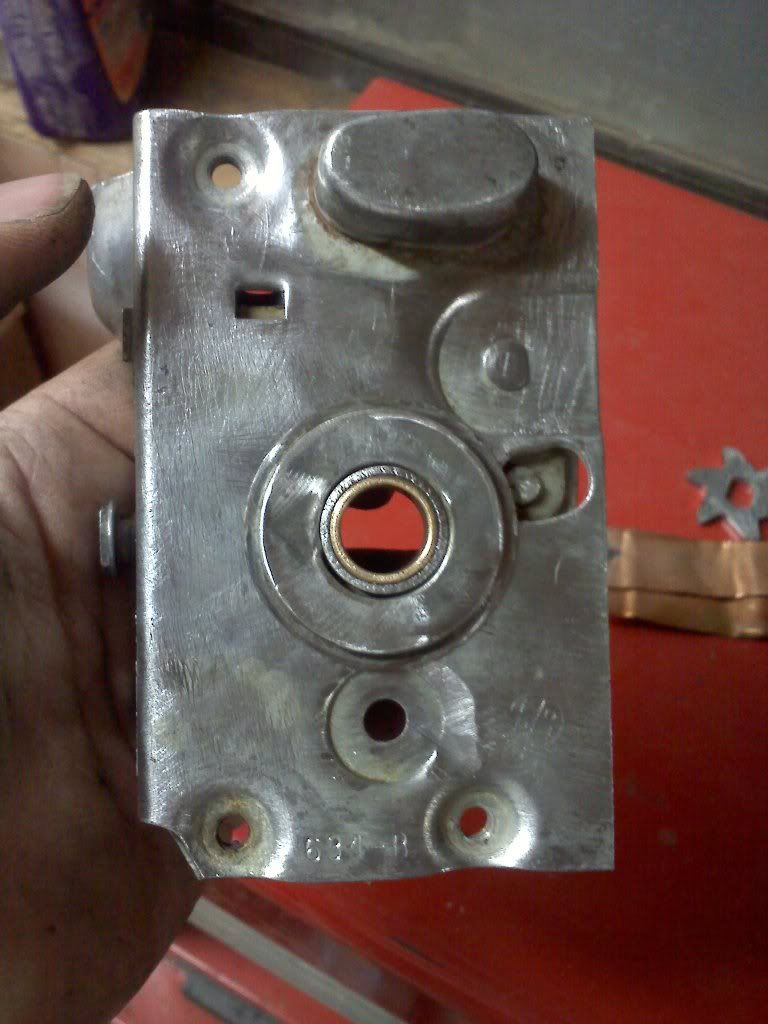
Next you want to cut the tab off of the end.

As well as cutting out this tab.

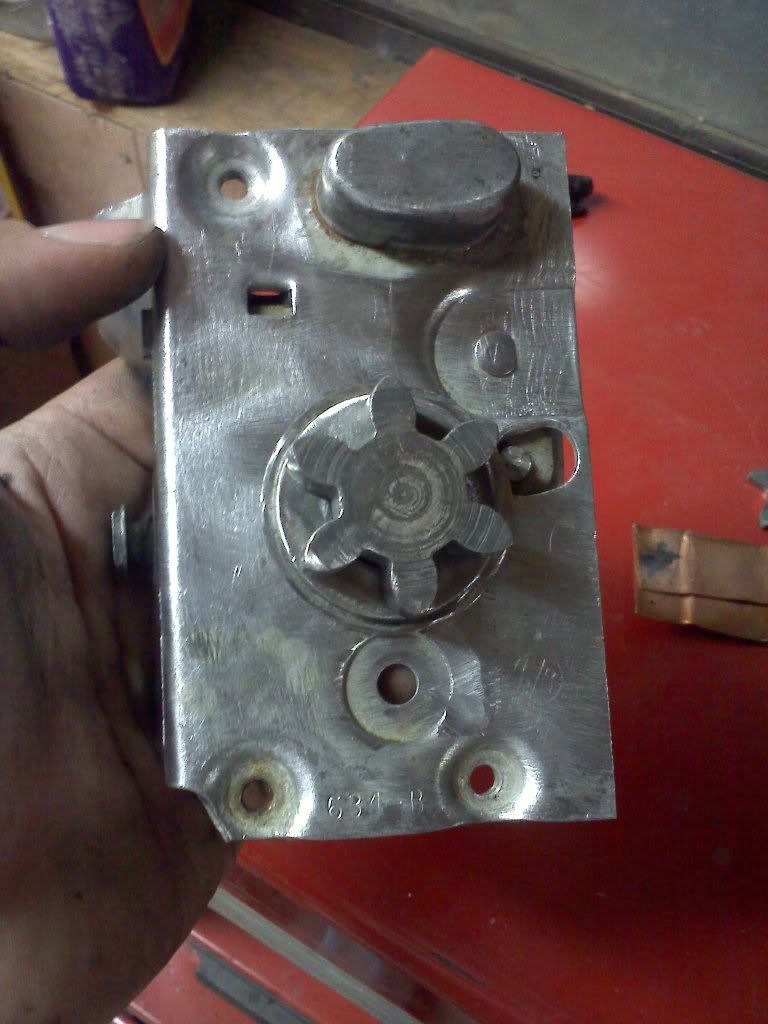
Once thats done, grind down the edges of the star on the back side. enough to knock it out. I like to leave a nugget of metal in the middle for later.
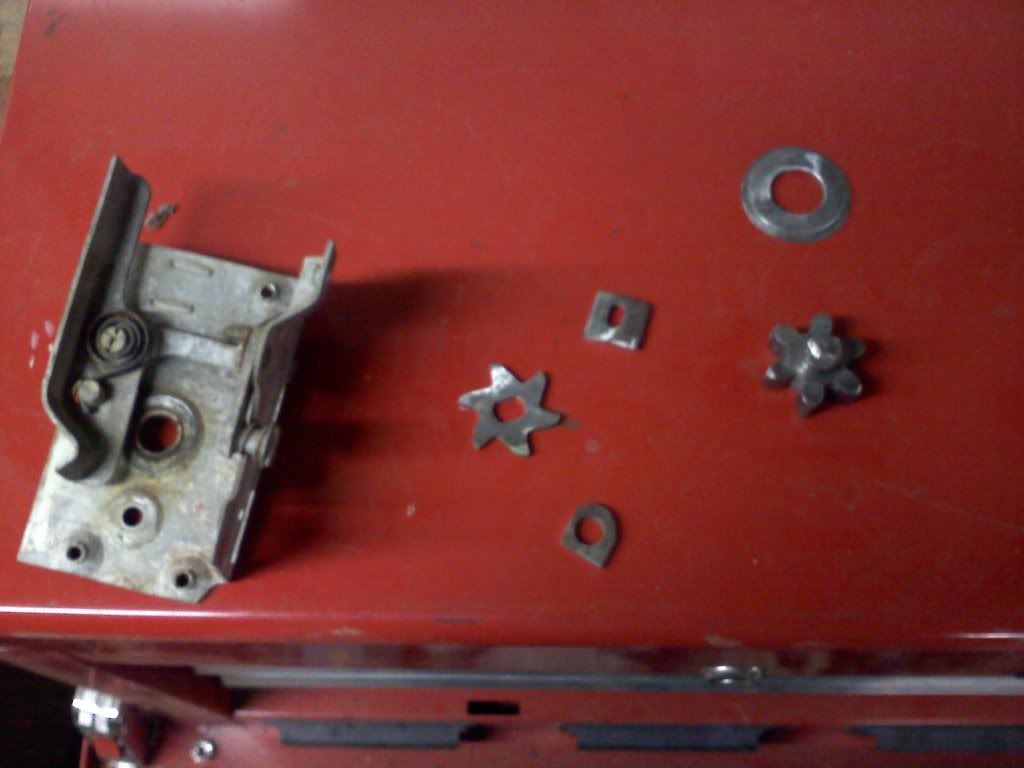
These are the pieces that are left when you cut everything and knock out the star.
Next you want to cut down the push release. * BE SURE NOT TO CUT THE POINTED EDGE THATS UNDERNEATH THE BOTTOM PIECE THAT YOU CUT OFF! YOU NEED THAT!!!*

Then you want to weld tab number 1 to the push linkage. getting it as close to the side as possible without touching it.
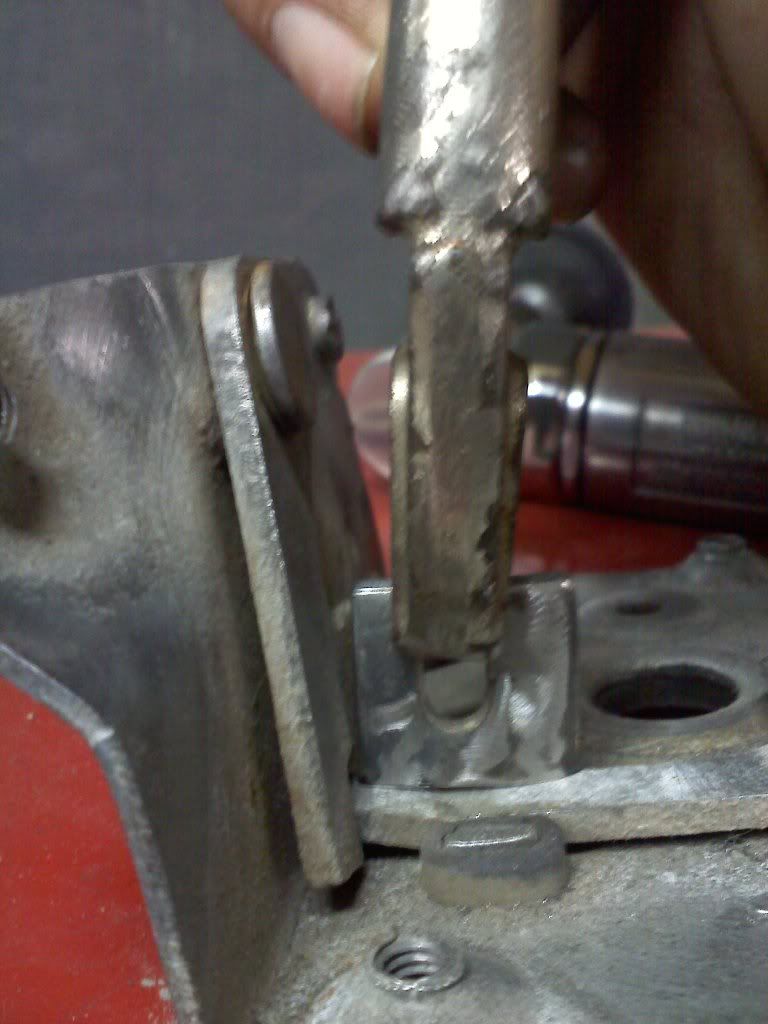
Weld tab number 2 down towards the bottom of the mechanism. (yeah, I know my welding sucks)
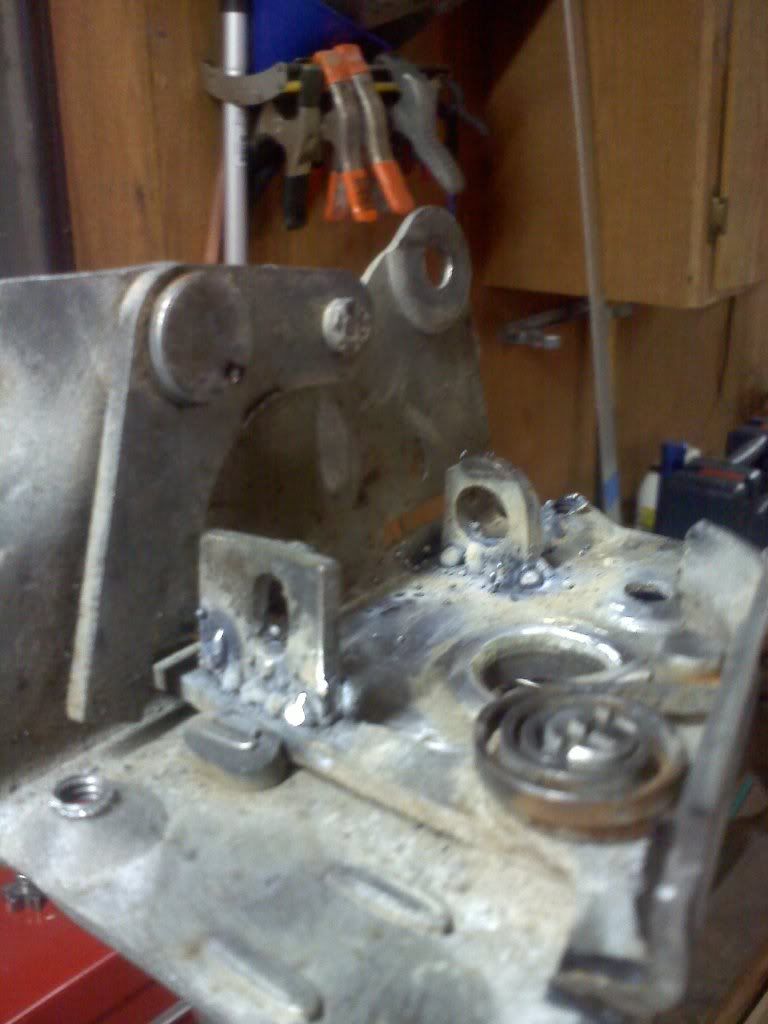
Now you want to weld a very small amount onto the point that I told you not to cut off earlier. This helps with the movement of the star.
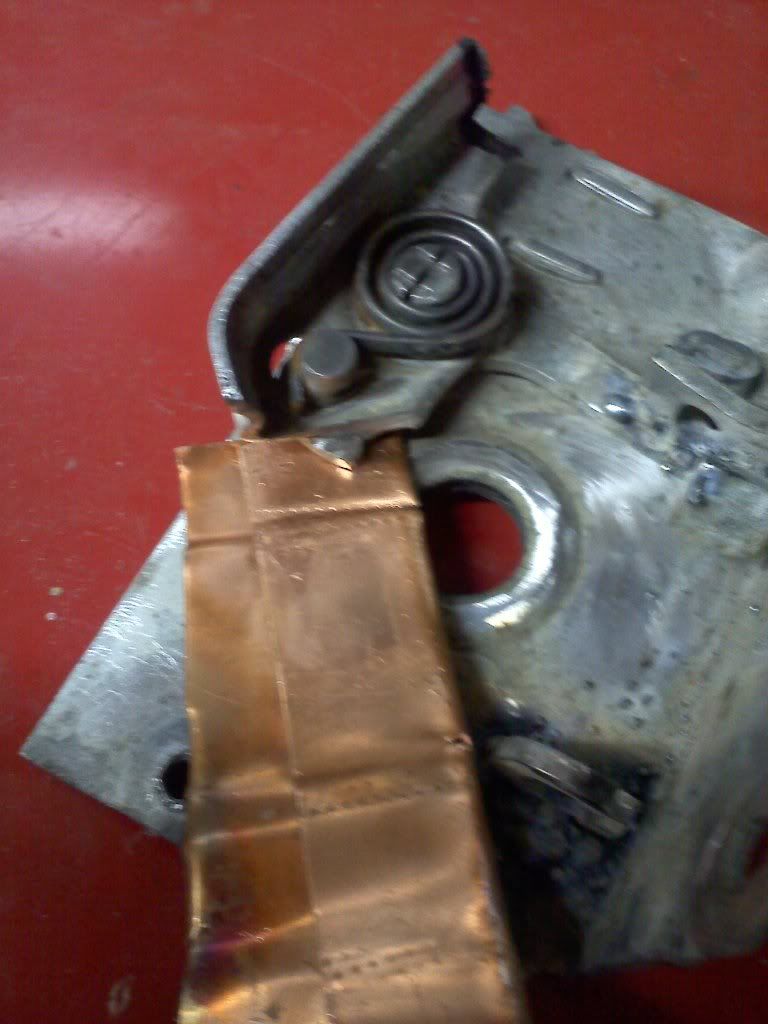
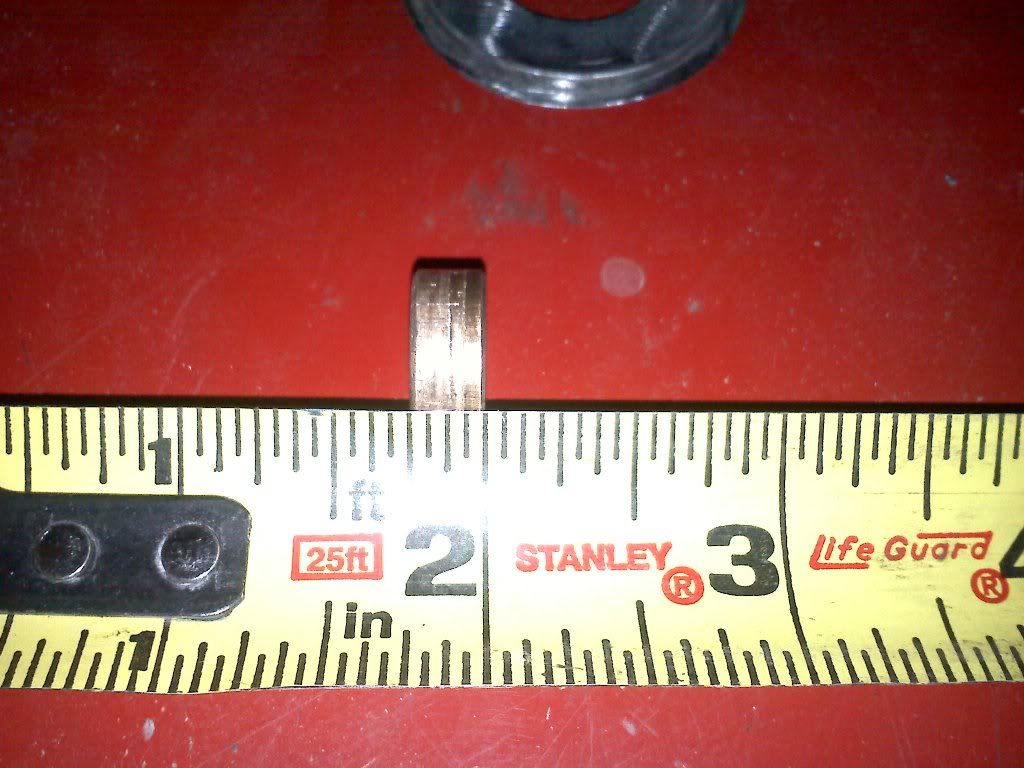
The brass fitting that holds the star in can either be replaced with a new piece that needs to be cut down, or you can just clean it up and put it back in. We cut new pieces and put them in. I dont remember exactly what size it was, but he picked it up from ACE I think. There is also a very small plastic white washer that he used to space the star on the outside. Kind of hard to explain cuz I dont have photos of it. I didnt have an extra one when I did this rebuild. Im not using this one in my car. Anywho, here is that brass fitting.
Now reassemble everything. Remember to use a lot of grease when reassembling. It really makes everything smooth.
We have come up with a way to rebuild the door latches/mechanisms for shaved handles. This also helps minimize the slack that is in the star.
The first step is to grind down the rivets and knock them out.
Grind out the one just below the star. Also grind out the one on the right side in this picture.
Punch out the rivets and this is what you are left with.
Next you want to cut the tab off of the end.
As well as cutting out this tab.
Once thats done, grind down the edges of the star on the back side. enough to knock it out. I like to leave a nugget of metal in the middle for later.
These are the pieces that are left when you cut everything and knock out the star.
Next you want to cut down the push release. * BE SURE NOT TO CUT THE POINTED EDGE THATS UNDERNEATH THE BOTTOM PIECE THAT YOU CUT OFF! YOU NEED THAT!!!*
Then you want to weld tab number 1 to the push linkage. getting it as close to the side as possible without touching it.
Weld tab number 2 down towards the bottom of the mechanism. (yeah, I know my welding sucks)
Now you want to weld a very small amount onto the point that I told you not to cut off earlier. This helps with the movement of the star.
The brass fitting that holds the star in can either be replaced with a new piece that needs to be cut down, or you can just clean it up and put it back in. We cut new pieces and put them in. I dont remember exactly what size it was, but he picked it up from ACE I think. There is also a very small plastic white washer that he used to space the star on the outside. Kind of hard to explain cuz I dont have photos of it. I didnt have an extra one when I did this rebuild. Im not using this one in my car. Anywho, here is that brass fitting.
Now reassemble everything. Remember to use a lot of grease when reassembling. It really makes everything smooth.
Saturday, May 21, 2011

Friday, May 6, 2011
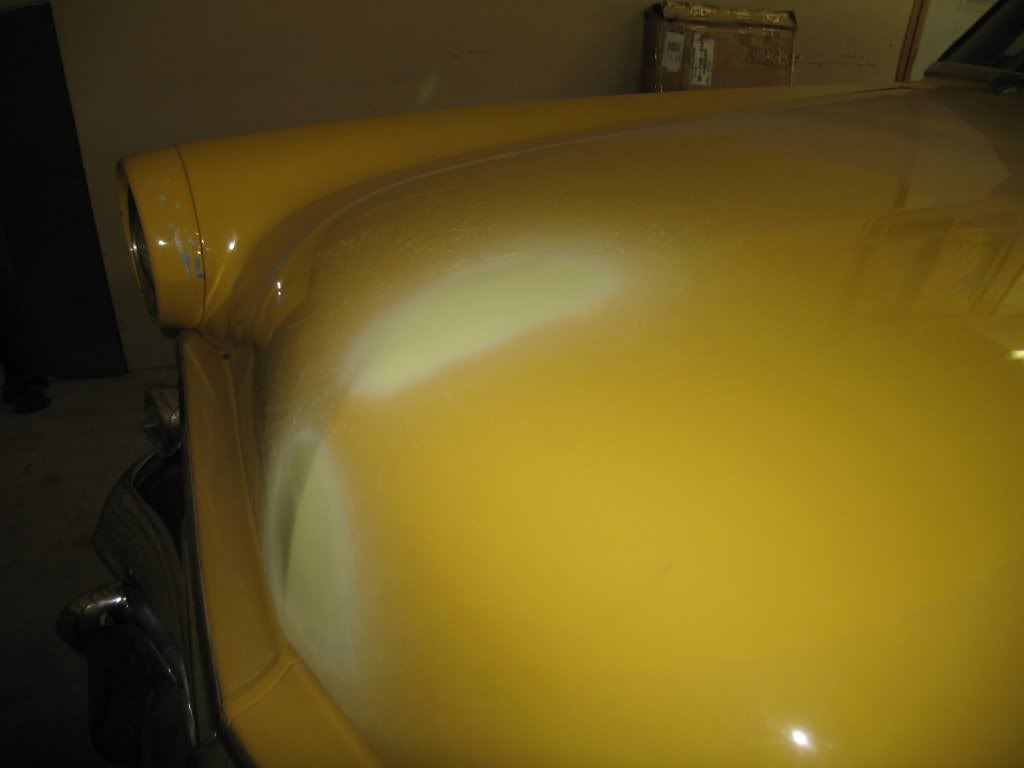
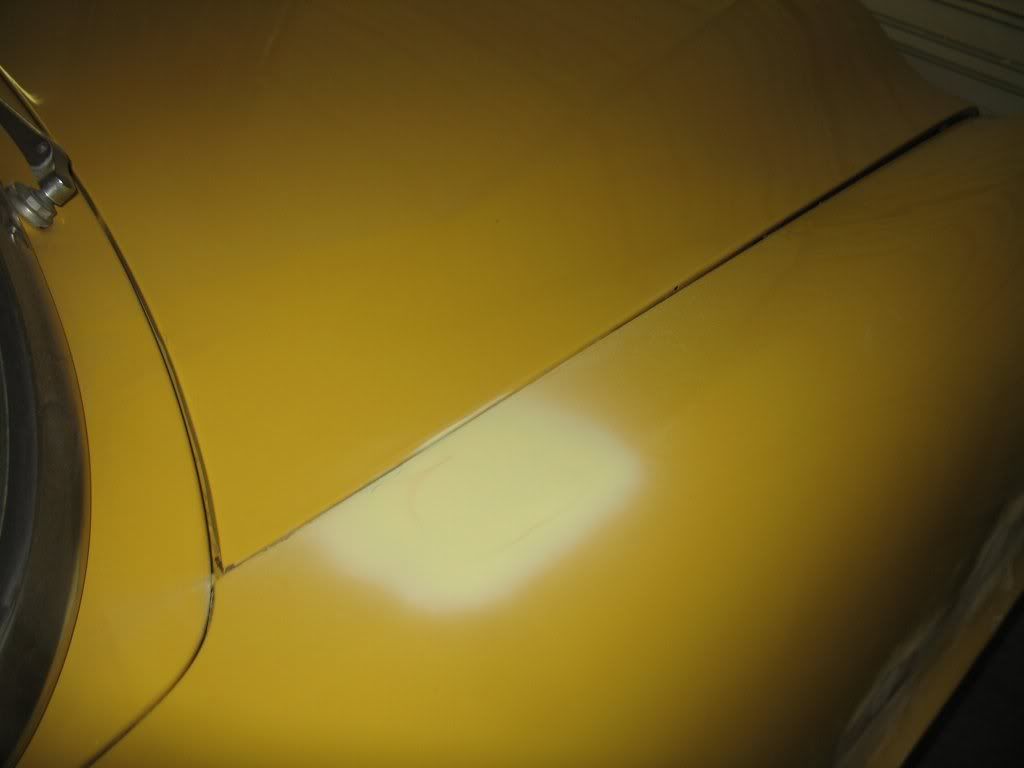
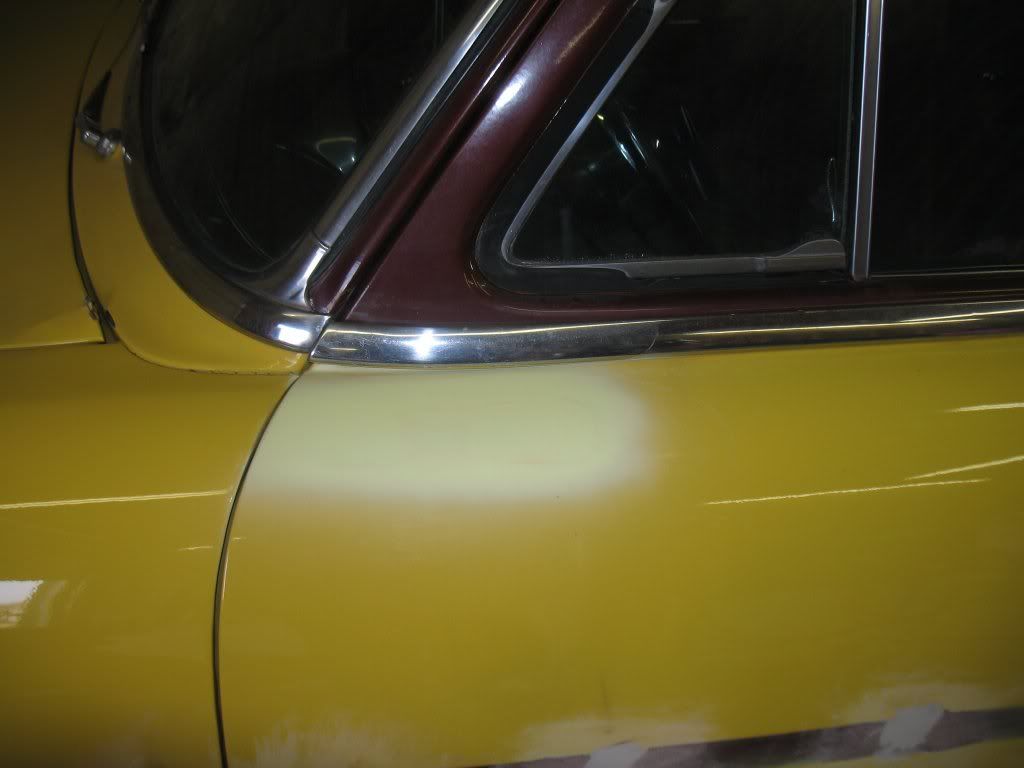
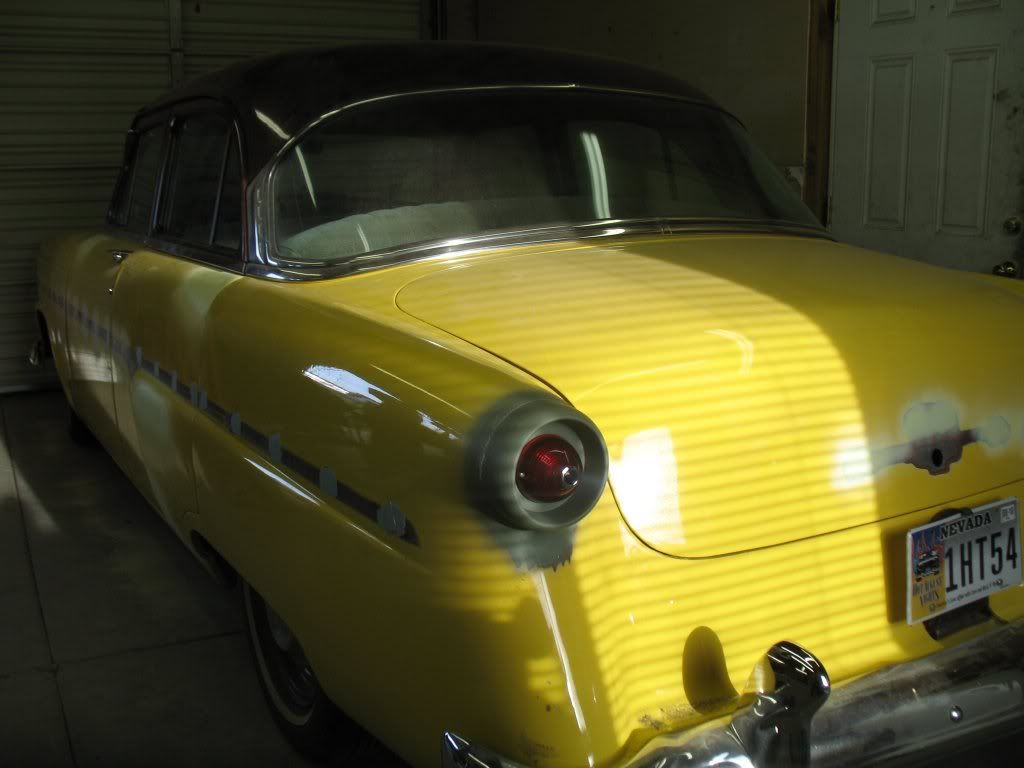
Primered Up A Few Spots
The hood, door handles, mirror and antenna have all been primered with a yellow primer. The car is coming together.
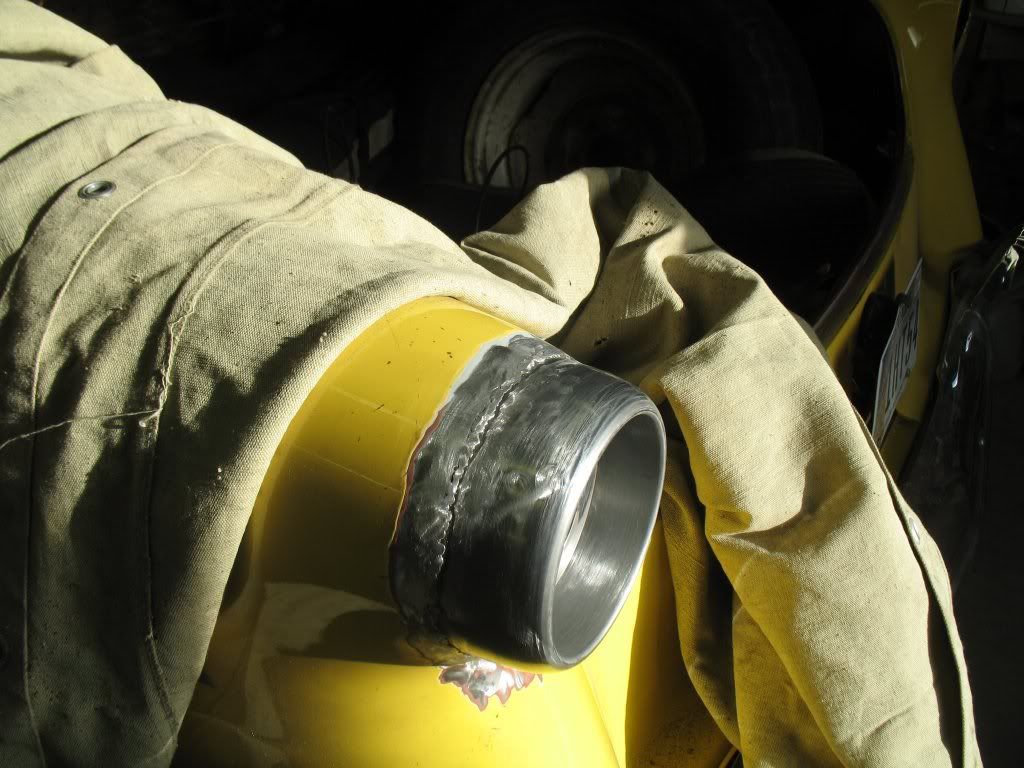
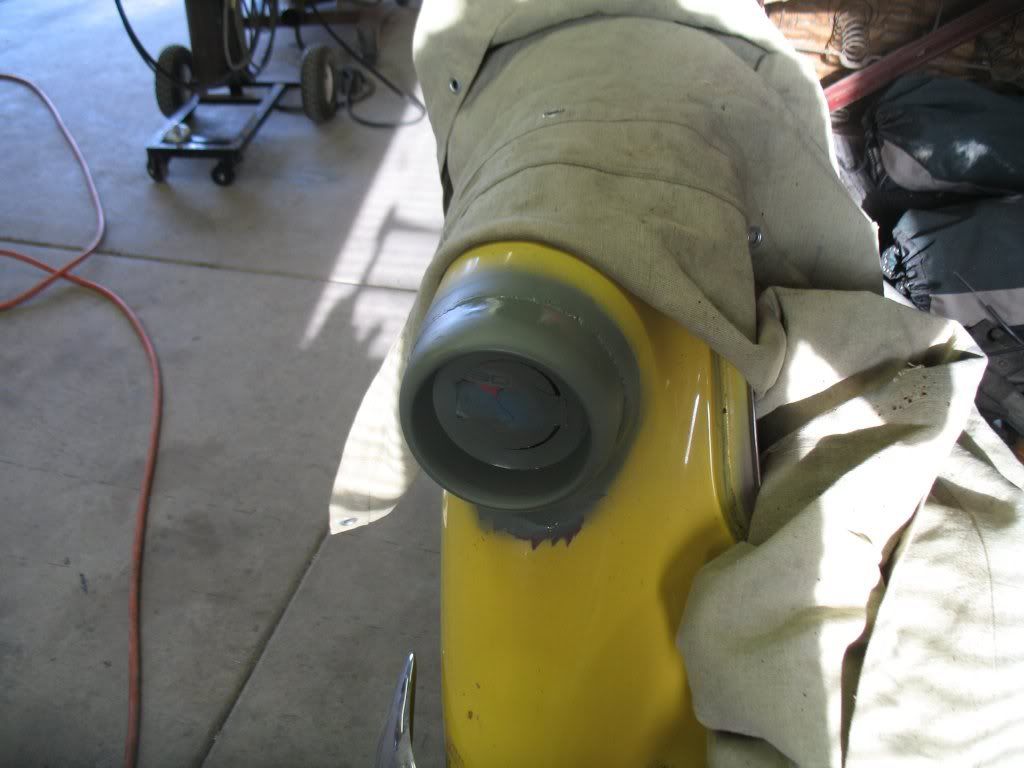
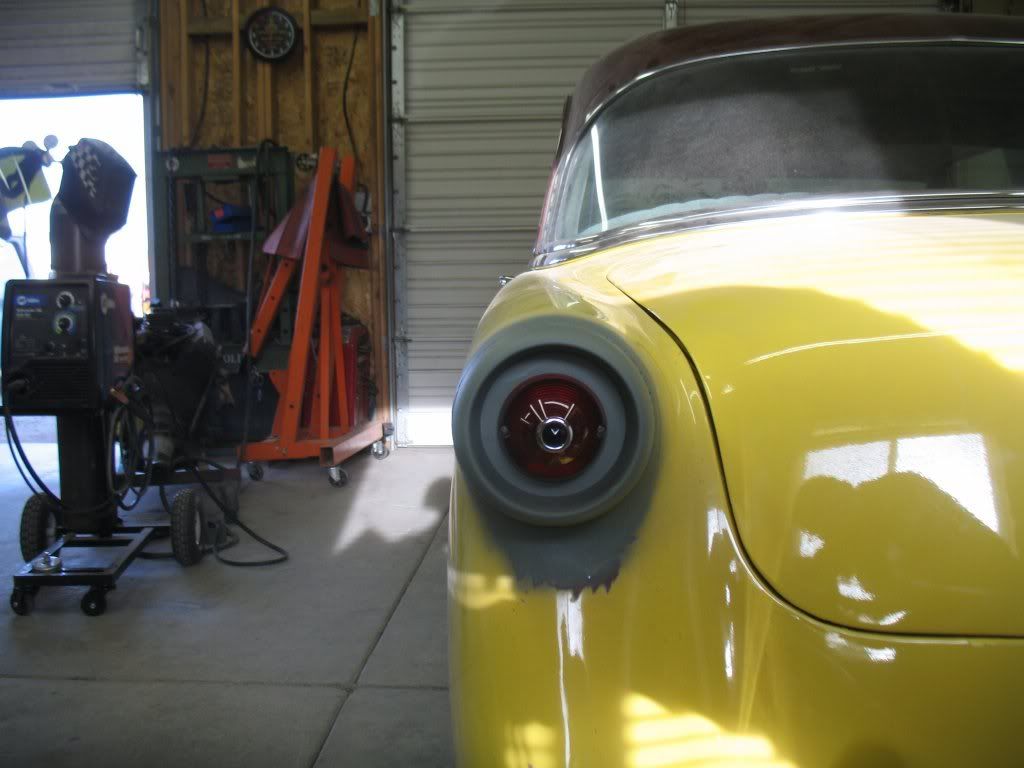
Driver Side Taillight Welded and Primered
Keith got the passenger side tail light bucket welded on, primered and the lens installed. We will be filling in the gaps and smoothing it out tonight.
Wednesday, May 4, 2011
Rust in the Y-Block
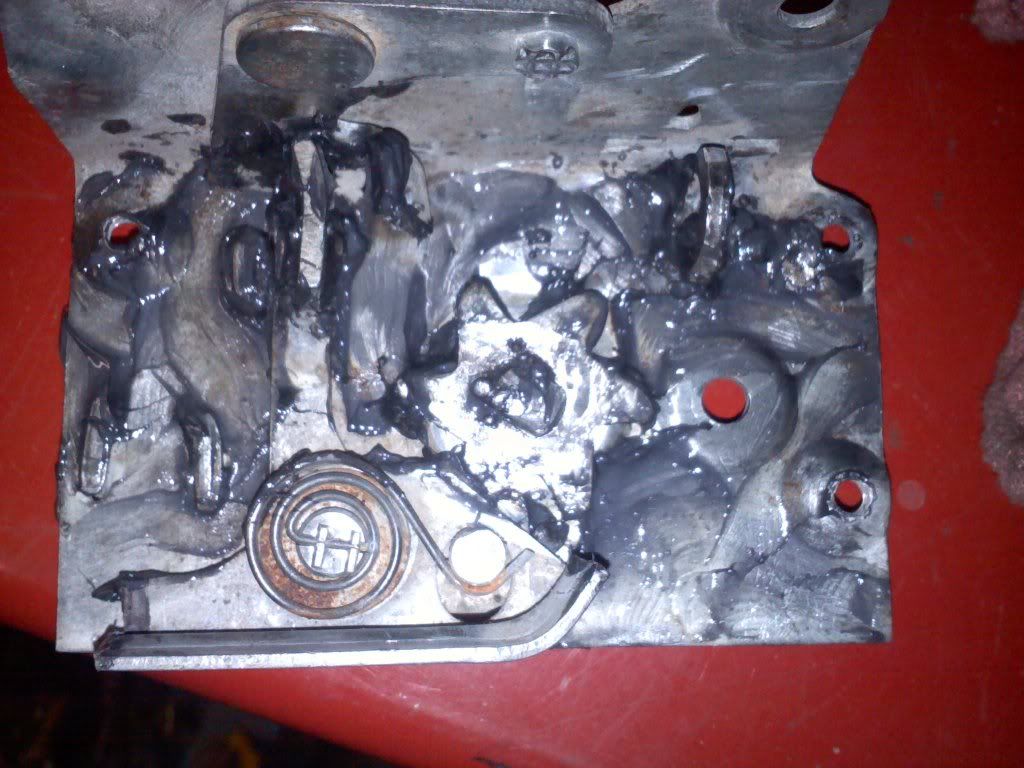
I pulled one of the heads on the Y and found good and bad news.
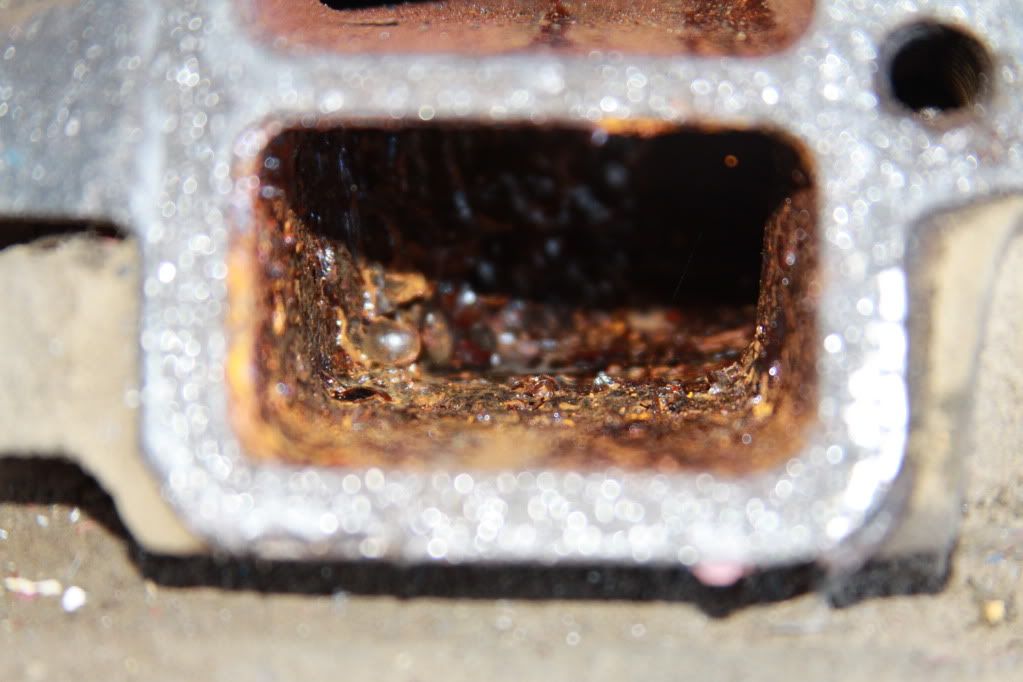
This was what greeted me on on of the intake ports on the head after I pulled the intake off. I have another port on the other head that is just as bad.
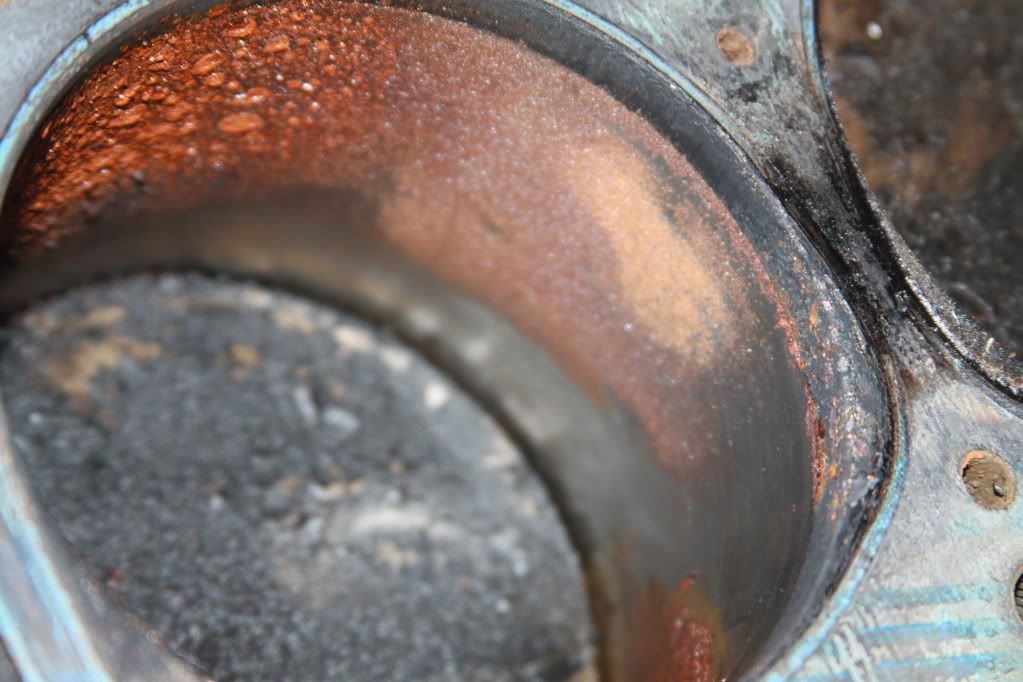
After the head was off this is what I found in one of the cylinders.
The good news is it was rebuilt before it was stored there is still cross hatching in the good cylinder bores.
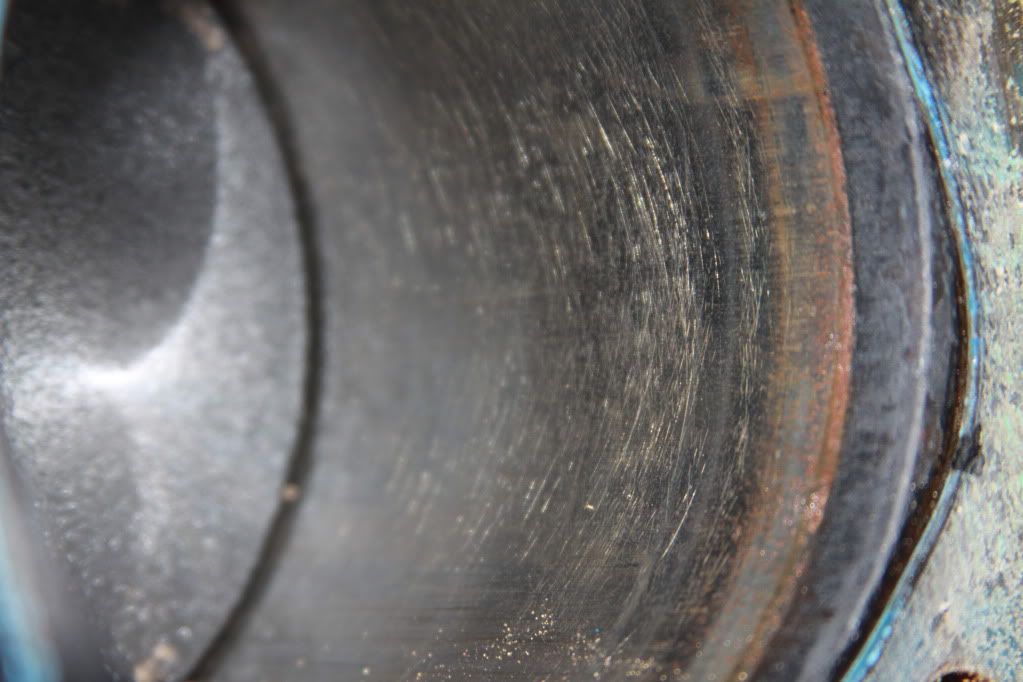
The head has also been modified and an additional hole has been drilled to cool the center of the cylinder head. Which is a good thing. It was rebuilt correctly.
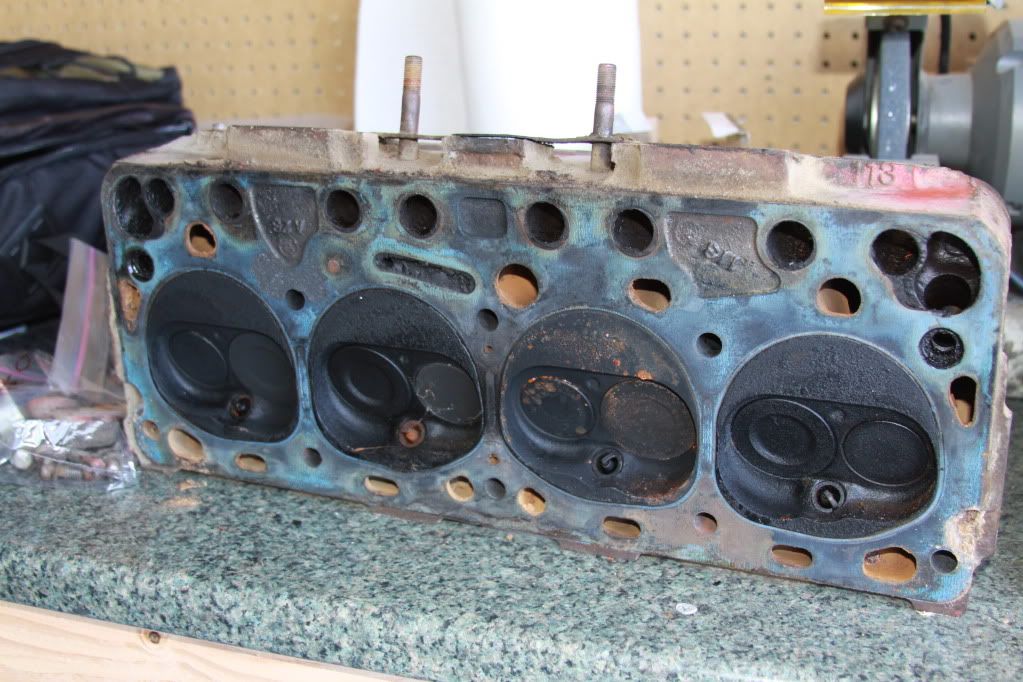
This is the worst combustion chamber (You can see the holes I refer to above easier in this picture, they are to the left of the combustion chamber)
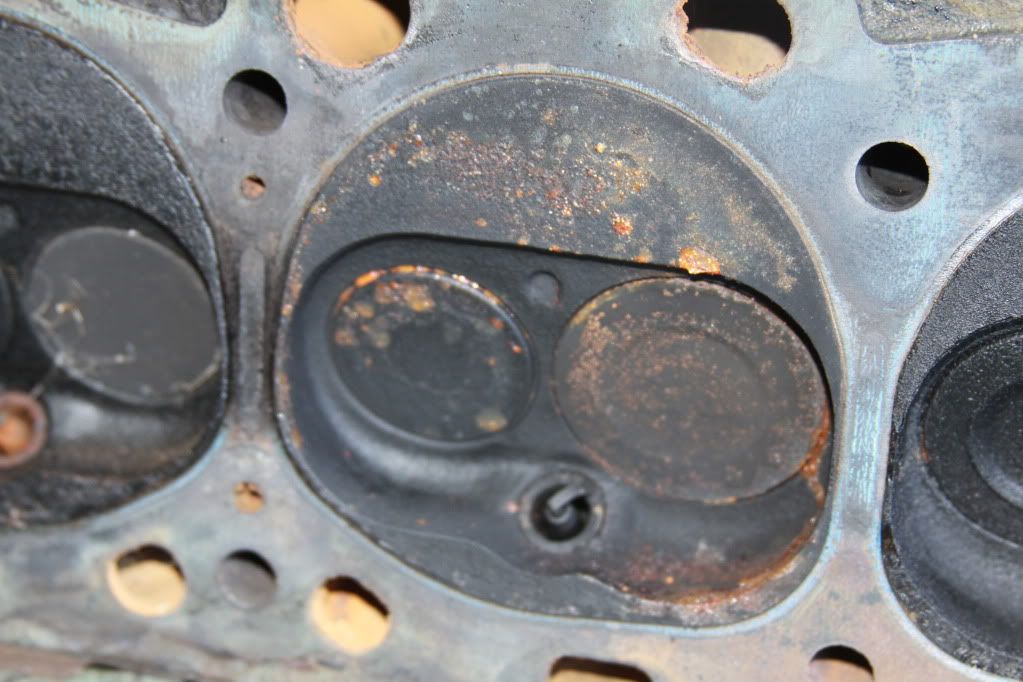
So I need to figure out if this is salvageable.
This was what greeted me on on of the intake ports on the head after I pulled the intake off. I have another port on the other head that is just as bad.
After the head was off this is what I found in one of the cylinders.
The good news is it was rebuilt before it was stored there is still cross hatching in the good cylinder bores.
The head has also been modified and an additional hole has been drilled to cool the center of the cylinder head. Which is a good thing. It was rebuilt correctly.
This is the worst combustion chamber (You can see the holes I refer to above easier in this picture, they are to the left of the combustion chamber)
Thursday, April 28, 2011
Taillights Mocked Up
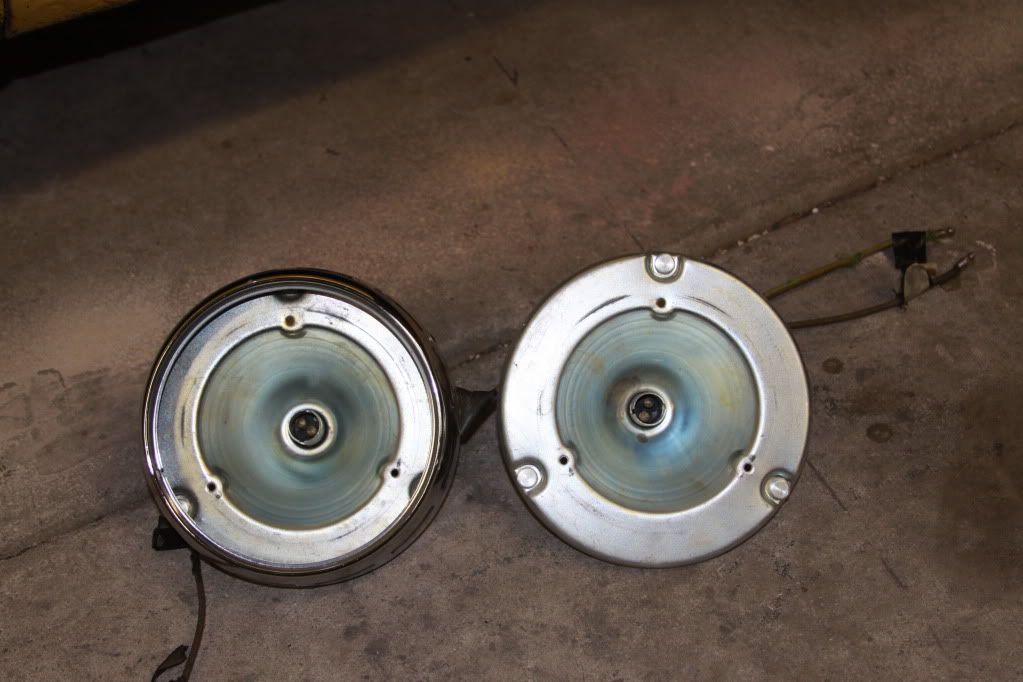
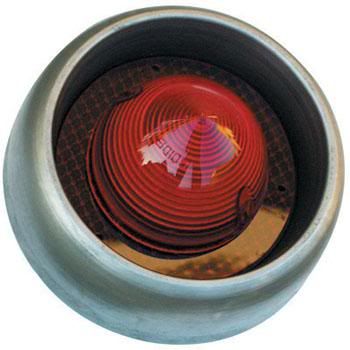
After we removed the stock tail lights we cannibalized the trim rings and use them on the new bezels. We popped the rivets out and used the light buckets on the new bezels. They fit perfectly.
The first two photos show the light bucket removed from the stock trim ring.
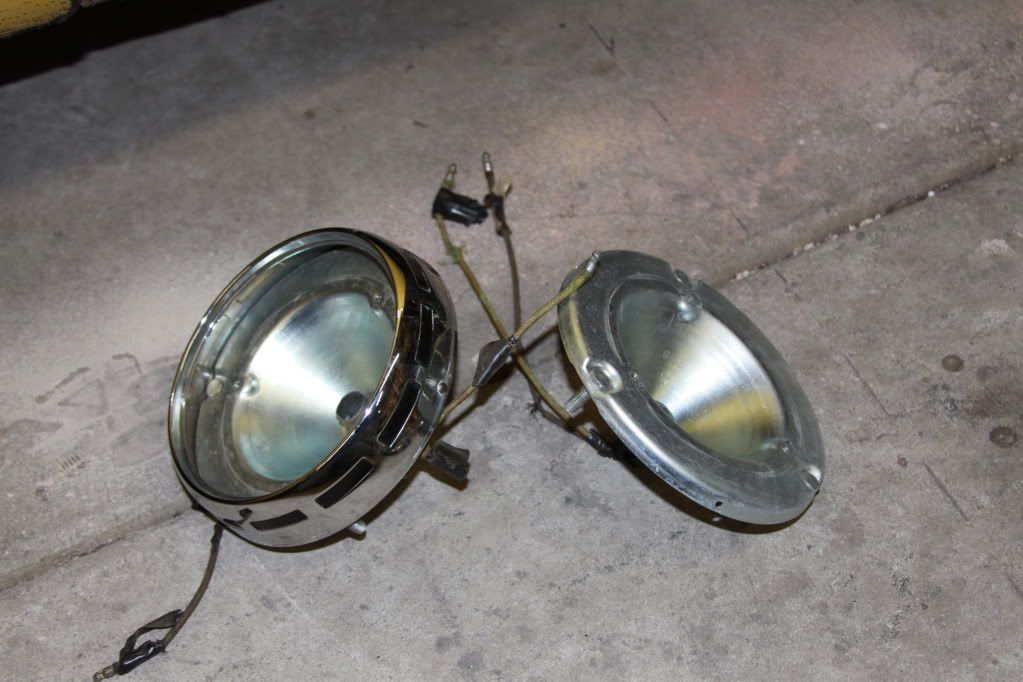
Here is the old and the new side by side (we will be replacing the old wiring before we install it.)
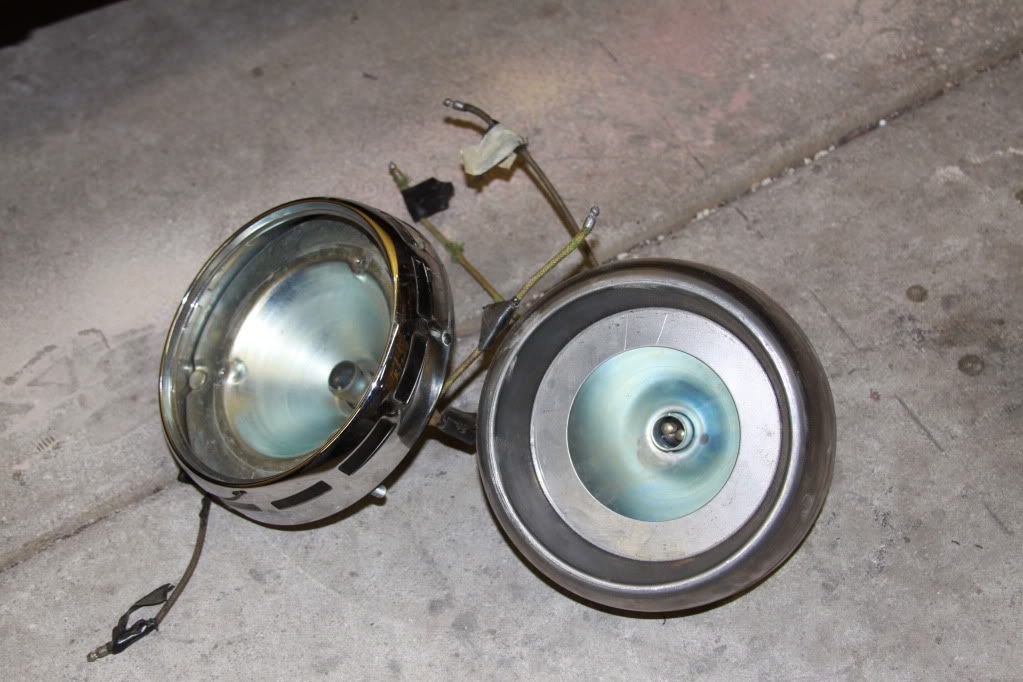
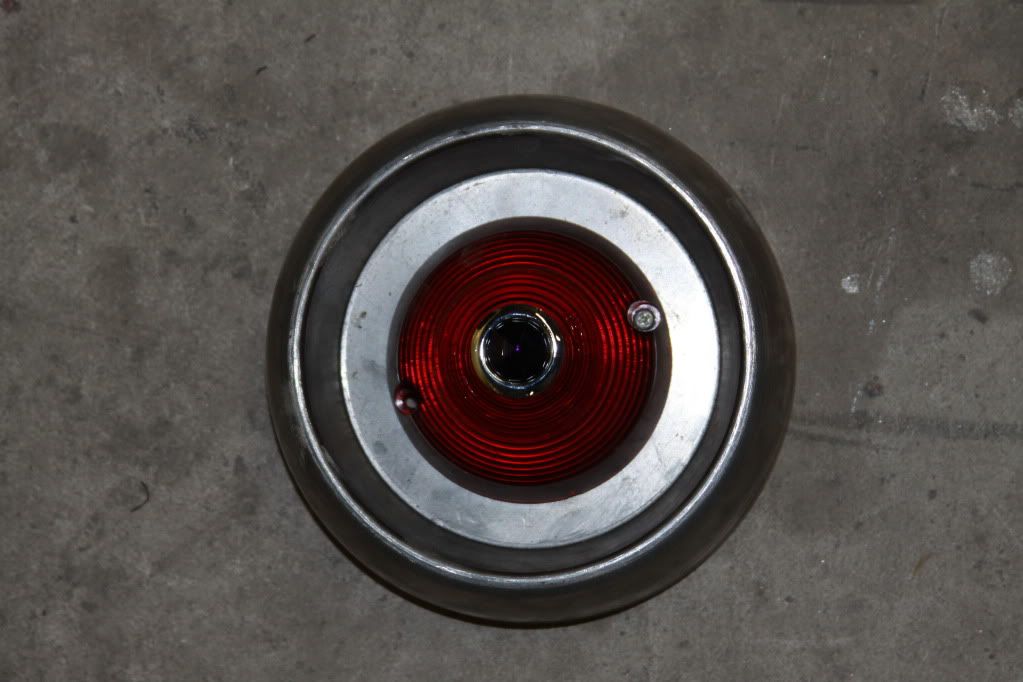
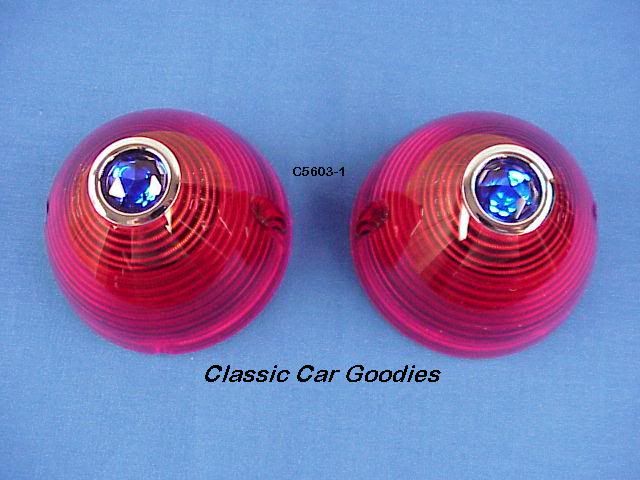
Here is how the lens and bezel will look together then they are on the car
The first two photos show the light bucket removed from the stock trim ring.
Here is the old and the new side by side (we will be replacing the old wiring before we install it.)
Here is how the lens and bezel will look together then they are on the car
Monday, April 25, 2011
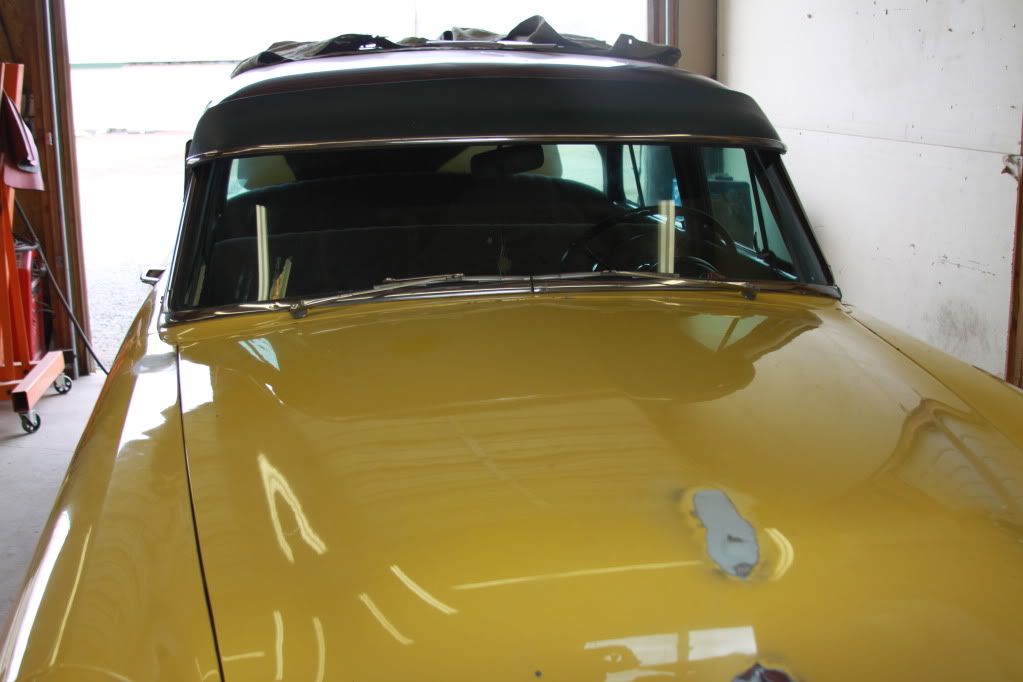
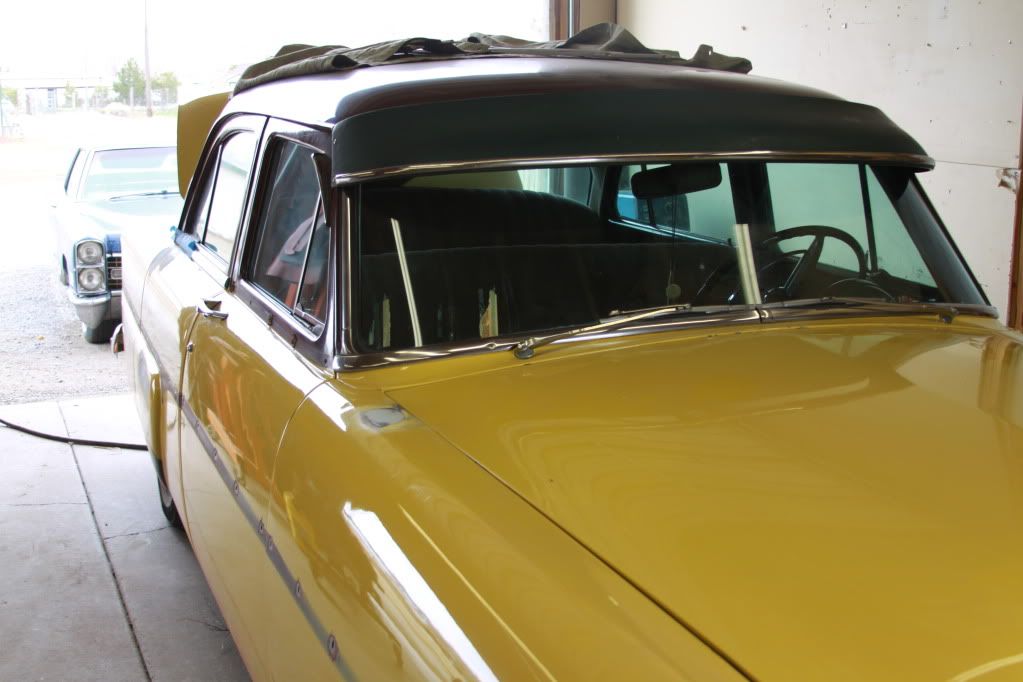
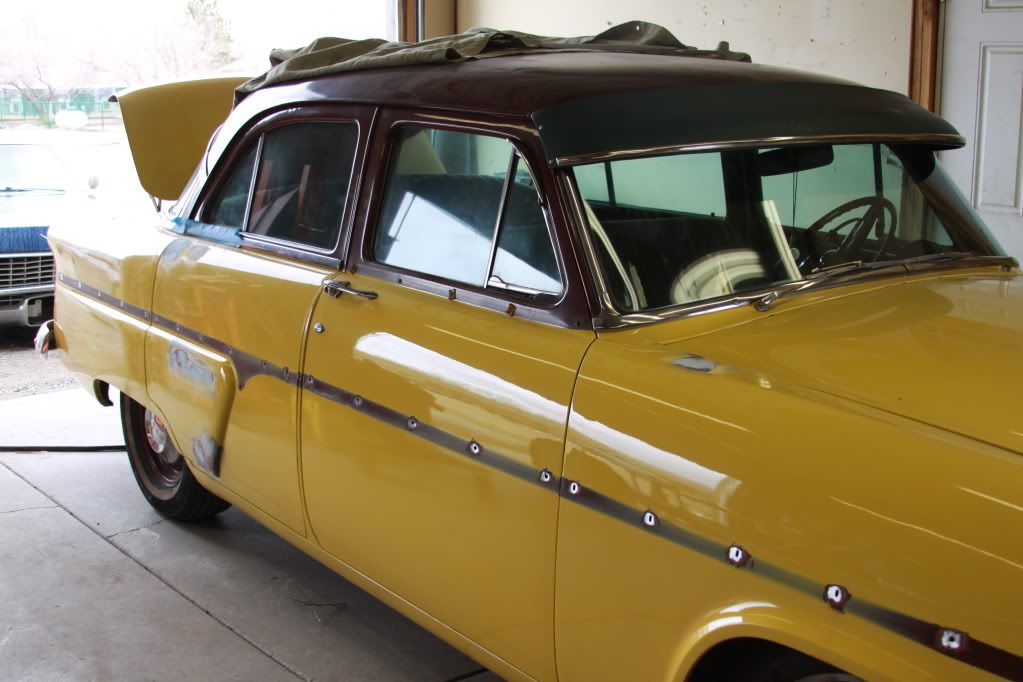
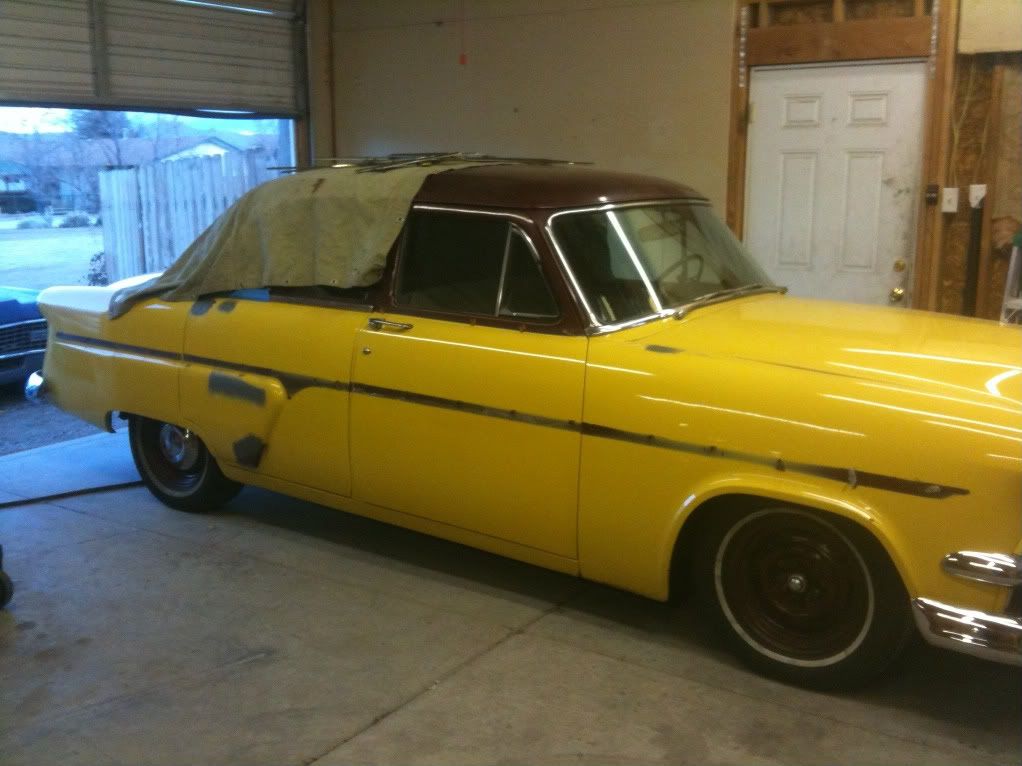
Got the visor installed
Well its green, but the visor is on. We also took the tail lights apart and mocked up the new frenched tail light assemblies. I will follow up later with pictures of that. For now here are some photos with the visor on the car.
Thursday, April 21, 2011
Removed the trim last night
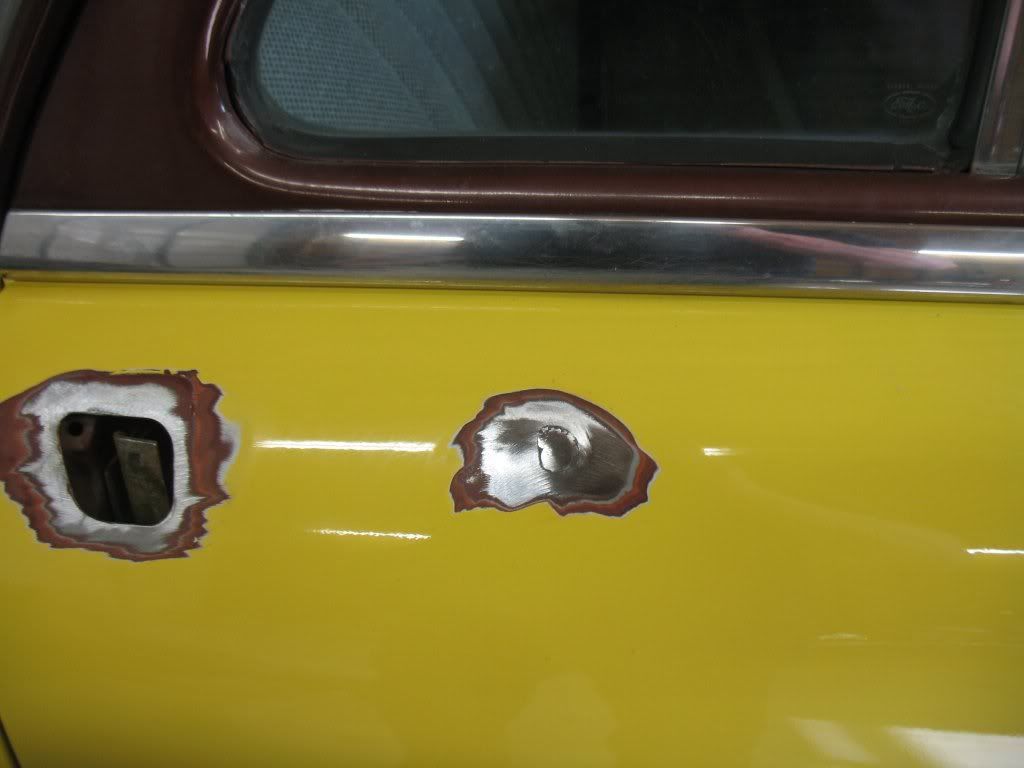
We got the dent in the hood knocked out, the larger holes in the rear door filled in and the trim removed last night.
If you are looking for trim, hood, trunk or door parts I am selling everything that is coming off the car.
If you are looking for trim, hood, trunk or door parts I am selling everything that is coming off the car.
Wednesday, April 20, 2011
Ordered the Parts for Frenching the Taillights Today
Have looking at other Fords and different lenses I have decided to use bezels from Moon Eyes and will modify them to use 56 Chevy lenses with glass blue dots.
Tuesday, April 19, 2011
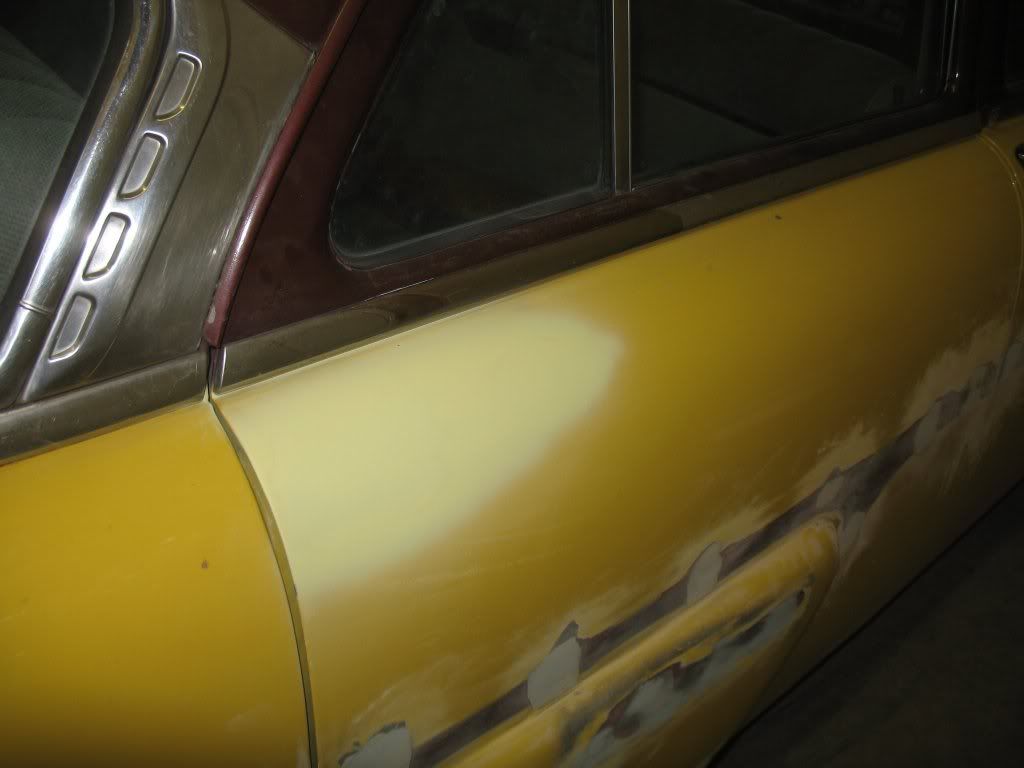
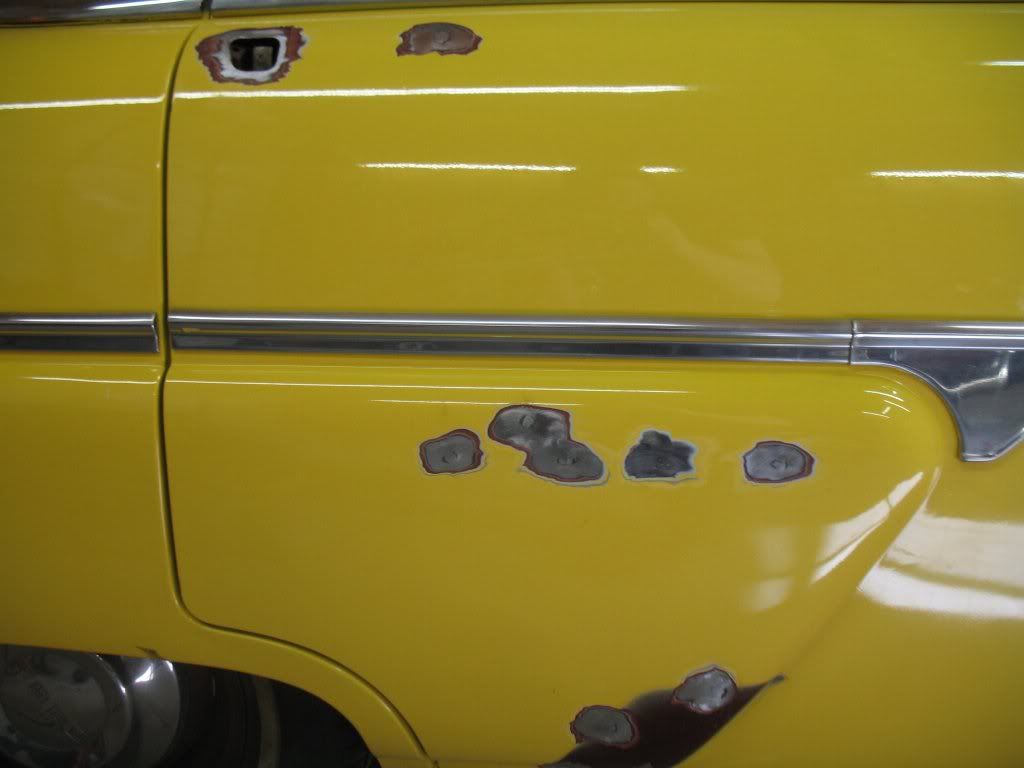
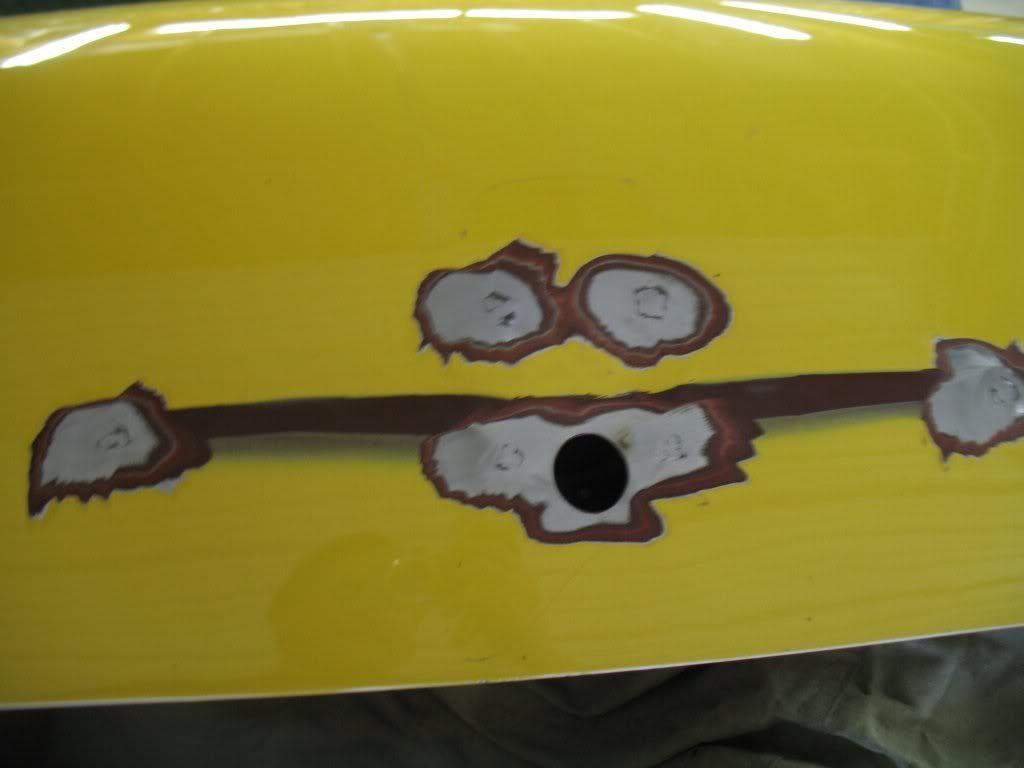
Door, script, trunk holes filled in
Keith is on a roll, he has filled in the holes where the Customline Script, Stone Guards, part of the door handles, and all of the trunk holes except the lock.

Saturday, April 16, 2011
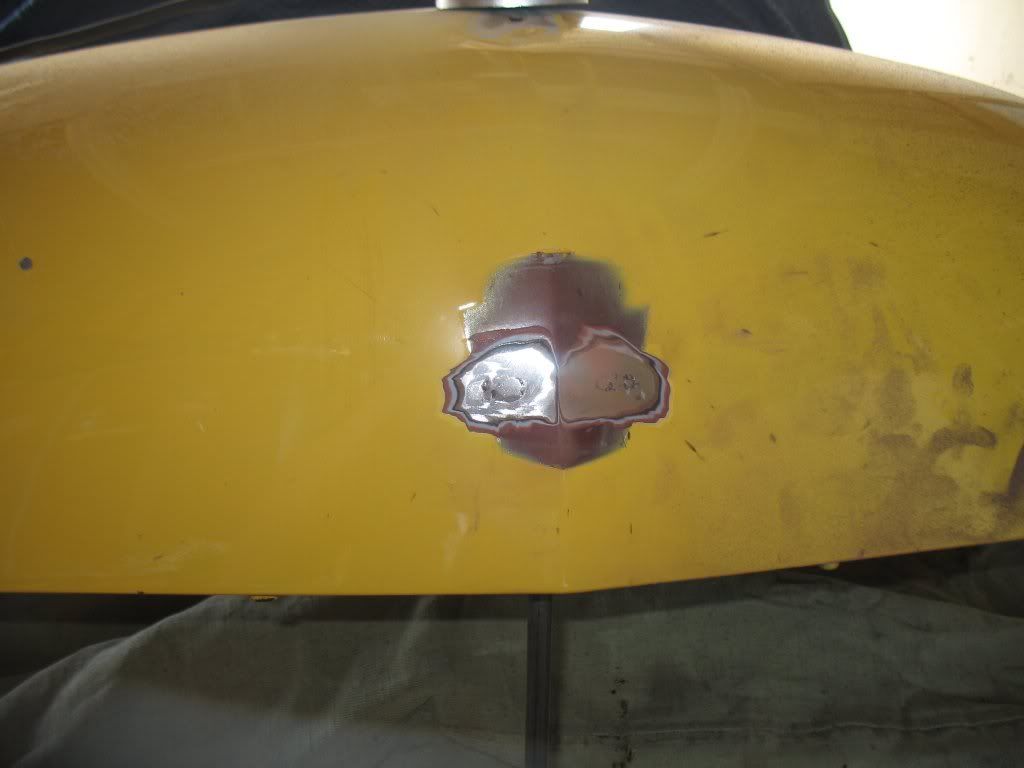
Got the Hood Ornament and Ford Emblem Removed Today
I had to work and missed helping out on the initial body work on the car today. Kieth removed and welded up the hood ornament and Ford emblem holes. The hood ornament was hiding a pretty good size dent so we will have to work that one out.
Thursday, April 14, 2011
Took the Ford in for a shave
Took the Ford to Averill Custom Automotive last night. They are going to nose, deck, shave the antenna, side mirror, remove some trim pieces, remove the rear door handles and french the taillights. I will be giving them a hand during the process and will post pictures of the progress.
You can see some of their work on Facebook.
Averill-Custom-Automotive
You can see some of their work on Facebook.
Averill-Custom-Automotive
Monday, April 11, 2011
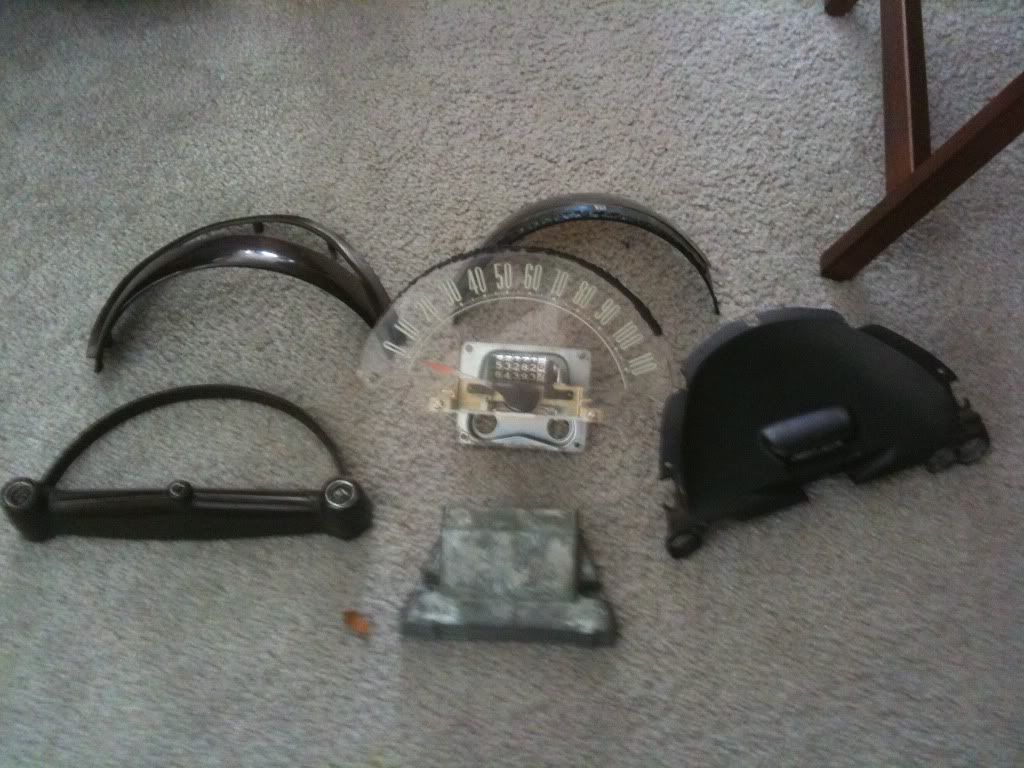
Speedometer Rebuild
My current speedometer didnt work except for the odometer. I picked up a used working speedometer and swapped the guts out. The speedometer seems to worked fine but the odometer doesn't work. Will have to play with it some more to see if something might just be stuck.
Subscribe to:
Posts (Atom)