We are already underway for the second annual Classic Rods Car show benefiting the American Heart Association. This is a non-profit event with all proceeds going to the AHA. It will be held at the Nugget in Sparks Nevada on June 25th 2011 from 4pm till 8pm. We will be having Elektric Rodeo, Little Sister and Blue Haven playing music, food from award winning Kinder's BBQ and of course great classic cars.
Thursday, September 30, 2010
Wednesday, September 1, 2010
Master Cylinder
So I posted below how I installed the master cylinder push rod but not the master cylinder itself. The original brake line plumbing has the front 2 brake lines and the rear brake line coming into a common 4 way fitting. This then plumbed into the master cylinder.
The new master cylinder has only two bolts holding it on. You need to make sure you replace the other bolts onto the firewall since these hold the brake pedal in place. The master cylinder I bought came with the portioning valves built in with the added option that if/when I move the rears to disc that I just move the brake line to the upper port. You can look below to see how the ports are setup.
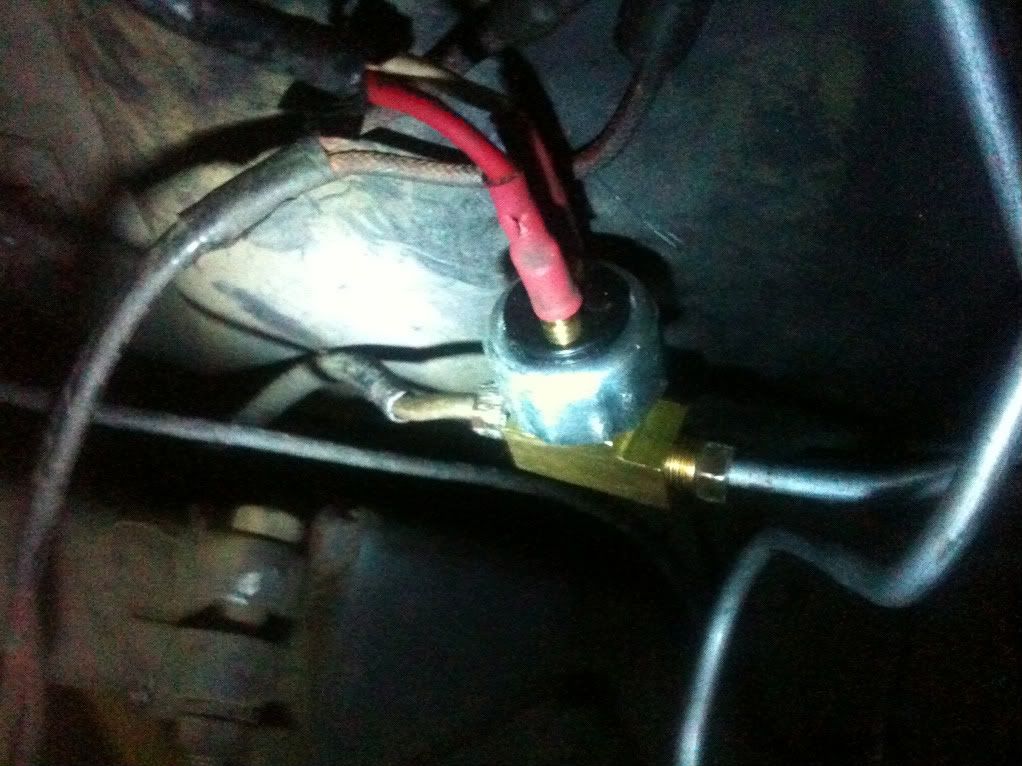
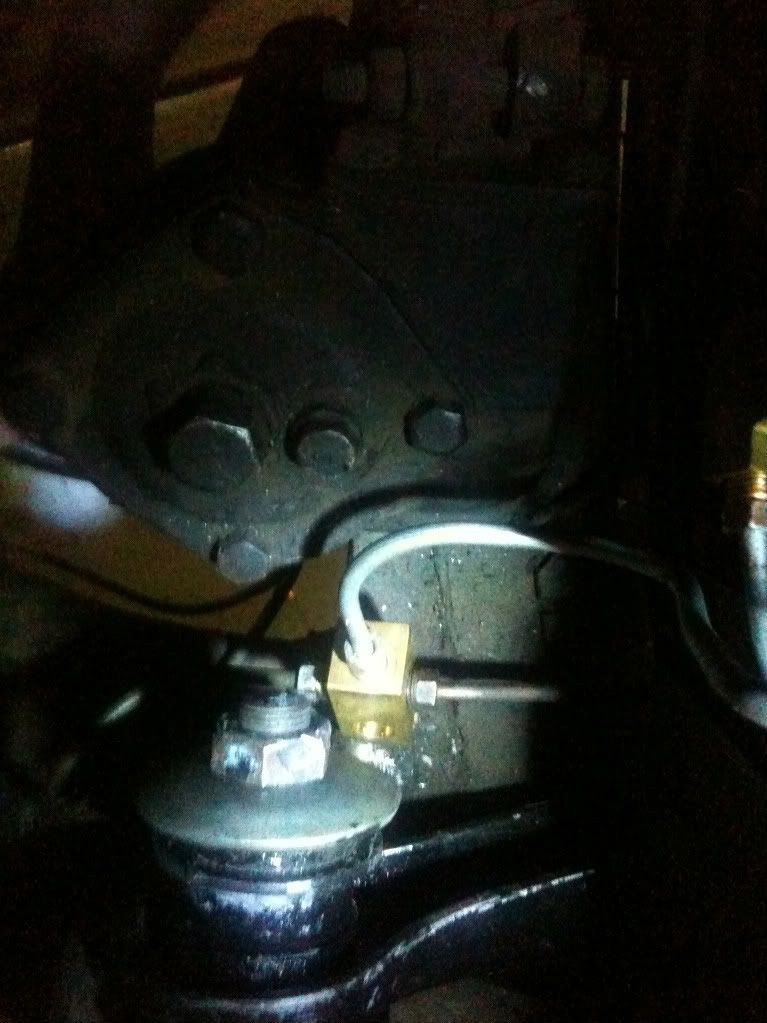
I ran the rear line into a T fitting that has the brake light switch. I added the brake light switch to the rear line since the portioning valve gives pressure to the rear first.This fitting was a real pain for me to find locally. I had to go to my local Clutch/Brake shop to get these since places like Summit Racing didn't carry them.
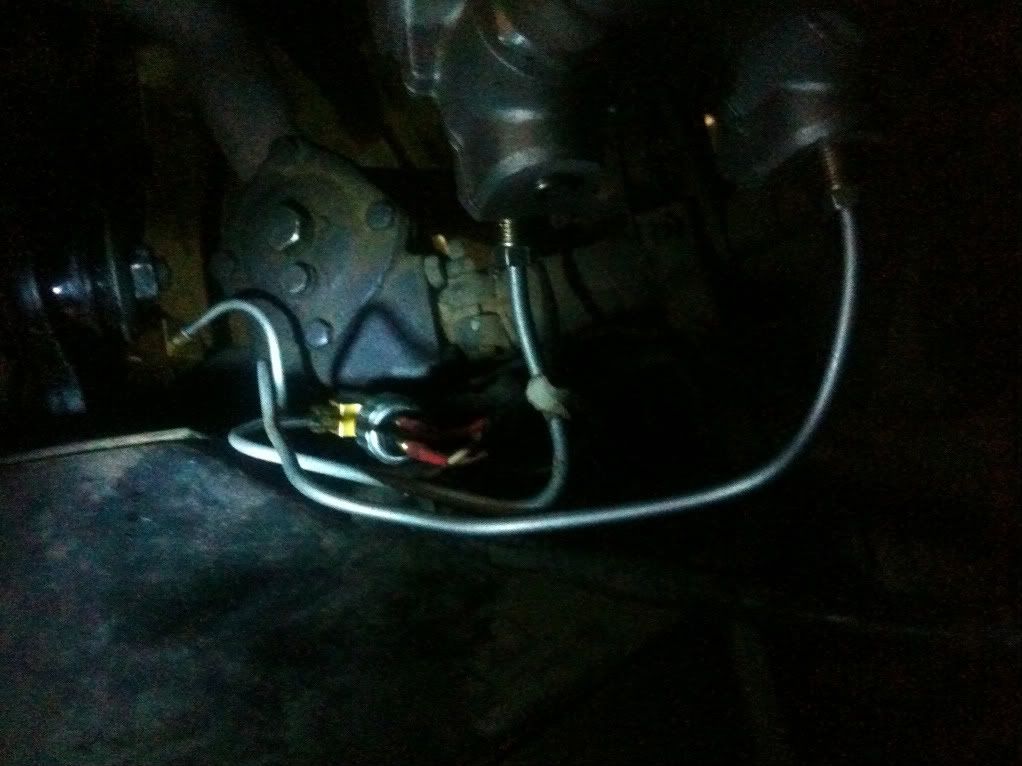
The fronts just used a basic T fitting that I was able to pick up at Summit Racing.
Once everything was plumbed up except connecting it to the master cylinder I then filled up the master cylinder with fluid, let it sit for 15 minutes then bench bled it. After I installed it on the firewall I connected up the two brake lines and then starting checking for leaks. My passenger side brake line where it attaches to the flexible brake line that then goes into the brake caliper leaked badly. I ended up having to replace this entire line. It was a very easy and straight forward install. It is only attached to the car on the cross-member that runs underneath the engine.
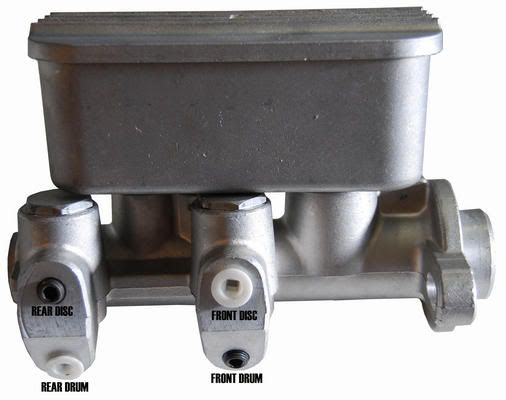
The new master cylinder has only two bolts holding it on. You need to make sure you replace the other bolts onto the firewall since these hold the brake pedal in place. The master cylinder I bought came with the portioning valves built in with the added option that if/when I move the rears to disc that I just move the brake line to the upper port. You can look below to see how the ports are setup.
I ran the rear line into a T fitting that has the brake light switch. I added the brake light switch to the rear line since the portioning valve gives pressure to the rear first.This fitting was a real pain for me to find locally. I had to go to my local Clutch/Brake shop to get these since places like Summit Racing didn't carry them.
The fronts just used a basic T fitting that I was able to pick up at Summit Racing.
Once everything was plumbed up except connecting it to the master cylinder I then filled up the master cylinder with fluid, let it sit for 15 minutes then bench bled it. After I installed it on the firewall I connected up the two brake lines and then starting checking for leaks. My passenger side brake line where it attaches to the flexible brake line that then goes into the brake caliper leaked badly. I ended up having to replace this entire line. It was a very easy and straight forward install. It is only attached to the car on the cross-member that runs underneath the engine.
Sunday, August 22, 2010
Front End Parts and Cost
Well here is a breakdown of what parts I bought and where I got them. There are a few things I did not list here that I needed that may not need to be replaced on every build. Like I need to replace the hard brake line from the passenger side to the junction block below the master cylinder.
| Part Number | Description | Place of Purchase | QNTY | Price |
| DBC5456F | 54-56 Disc Brake Conversion | Jamco Suspension | 1 | $ 529.95 |
| MSTR010 | Universal Master Cylinder - Raw | Jamco Suspension | 1 | $ 165.95 |
| MCBK01 | Master Cylinder Bleed Kit | Jamco Suspension | 1 | $ 3.95 |
| DFK5464 | 54-64 Front Coil and Shock Kit (3 inch drop) | Jamco Suspension | 1 | $ 203.96 |
| Upgrade | Upgrade Shock to Bilstein (If you are lowering your car ask for shock part 55-R230) | Jamco Suspension | 1 | $ 193.00 |
| 3049 | Upper Ball Joint | Concours Parts | 2 | $ 100.00 |
| 3050 | Lower Ball Joint | Concours Parts | 2 | $ 100.00 |
| 3073-K | Front Suspension Bushing Kit | Concours Parts | 1 | $ 42.95 |
| 8A-3011 | Insulator Front Spring | Concours Parts | 2 | $ 9.90 |
| B5A-3352-A | Idler Arm and Bushings | Concours Parts | 1 | $ 34.95 |
| 8A-3A130 | Tie Rod End | Concours Parts | 2 | $ 30.00 |
| AD-3280-B | Spindle Connecting Rod | Concours Parts | 2 | $ 75.90 |
| 3310 | Tie Rod Sleeve | Concours Parts | 2 | $ 19.00 |
| B4A-3021-K | UP&LWR Control Arm Bumpers | Concours Parts | 1 | $ 29.95 |
| ENS-9-5156G | Sway Bar bushing | Summit Racing | 1 | $ 15.95 |
| ENS-9-8117G | End Link Set | Summit Racing | 1 | $ 15.39 |
| RUS-657330 | Brake Line Rotor to Hard Line | Summit Racing | 2 | $ 51.90 |
| PRF-80171 | Brake Light Switch | Summit Racing | 1 | $ 10.25 |
| SSB-A1726 | Adjustable Master Cylinder Pushrod | Summit Racing | 1 | $ 53.95 |
| 813-1203 | Hard Brake Line 8" | Napa | 2 | $ 15.16 |
| None | T-Adapter for Light Switch | Local Brake Store | 1 | $ 10.75 |
| None | Synthetic Brake Fluid | Kragen | 1 | $ 12.00 |
| None | Paint and Primer | Paint Store | 1 | $ 23.60 |
| Total | $1,748.41 |
Monday, August 16, 2010
Master Cyclinder Rod Replacement
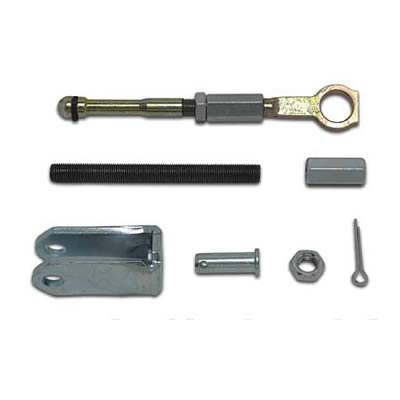
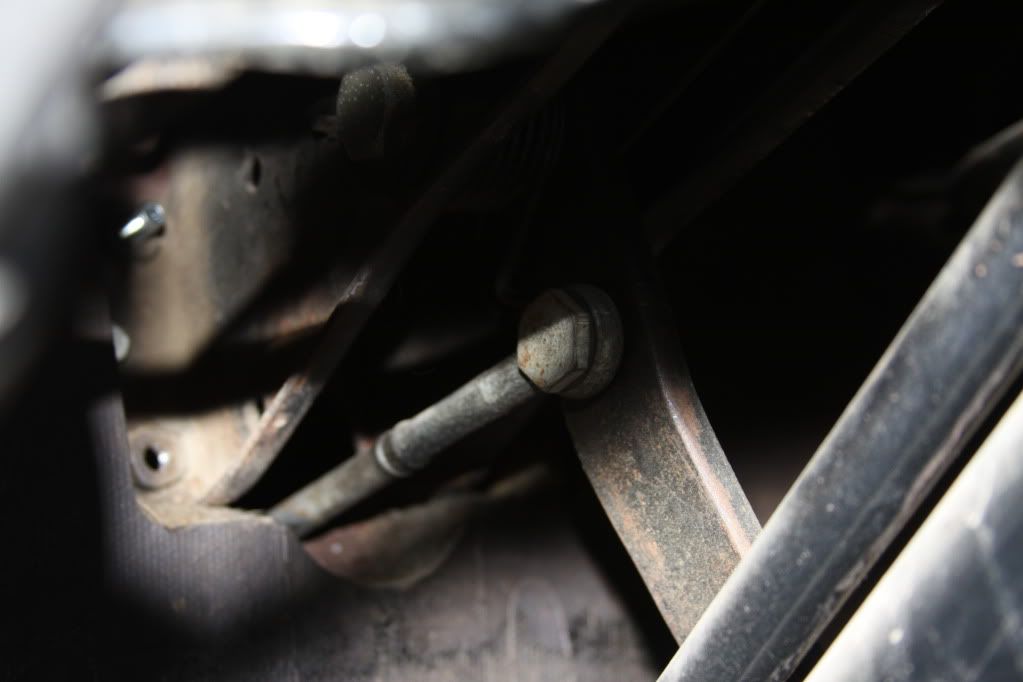
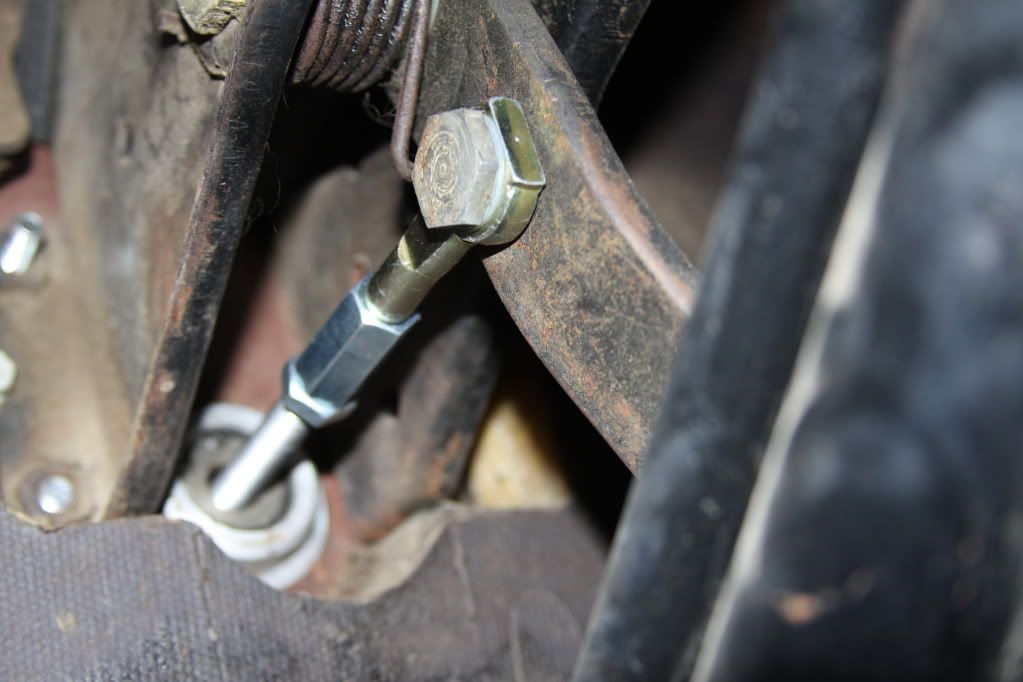
The following is how I replaced the master cylinder rod that attaches to the brake pedal and goes into the master cylinder. This is the kit I bought from Summit SUM-760125. However this is the part I got from them. After the installation was done I was asked for the part number I used I realized they gave me the wrong/right part. The part I got was SSB-A1726. Which is 10 dollars more. The kit comes with various was of creating the rod assembly to suit your needs. The way I put it together was as follows.
The threaded bolt threaded through large elongated nut into the eyelet. I then mounted the master cylinder to the car. I then put the rod assembly I created into the master cylinder from inside the car to see how it matched up with the opening in the brake pedal. It measured about 1/2 inch too long. So I used a dremel and cut a 1/4 inch off first and remeasured. Once I was sure another 1/4 inch needed to come off I cut again. At this point it was long enough and could be adjust in and out with the eccentric bolt. I then used the supplied nut to tighten down and lock the length of the rod in place. It came with 2 nylon washers. I could only use one because of how it fit back together. I used the eccentric washer to make sure I had a 1/4 inch of brake pedal play per the shop manual and tightened everything down.
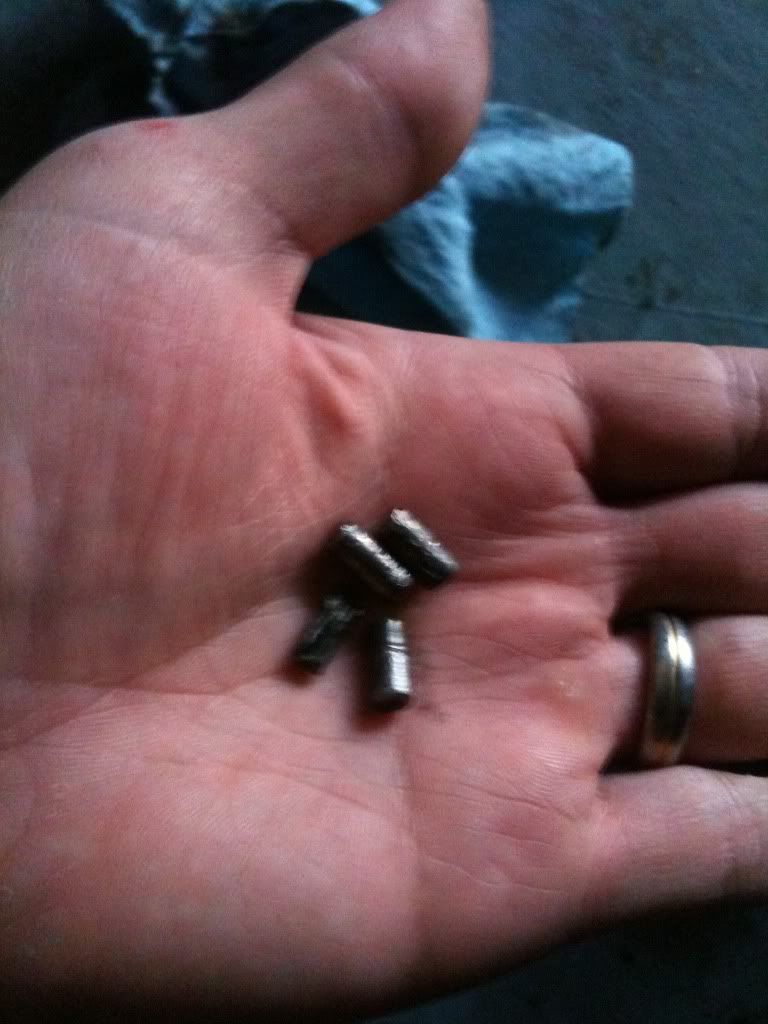
Here is what comes in the kit:
 Here is the before:
Here is the after:
The threaded bolt threaded through large elongated nut into the eyelet. I then mounted the master cylinder to the car. I then put the rod assembly I created into the master cylinder from inside the car to see how it matched up with the opening in the brake pedal. It measured about 1/2 inch too long. So I used a dremel and cut a 1/4 inch off first and remeasured. Once I was sure another 1/4 inch needed to come off I cut again. At this point it was long enough and could be adjust in and out with the eccentric bolt. I then used the supplied nut to tighten down and lock the length of the rod in place. It came with 2 nylon washers. I could only use one because of how it fit back together. I used the eccentric washer to make sure I had a 1/4 inch of brake pedal play per the shop manual and tightened everything down.
Here is what comes in the kit:
Here is the after:
Tuesday, August 10, 2010
Bearing Failure
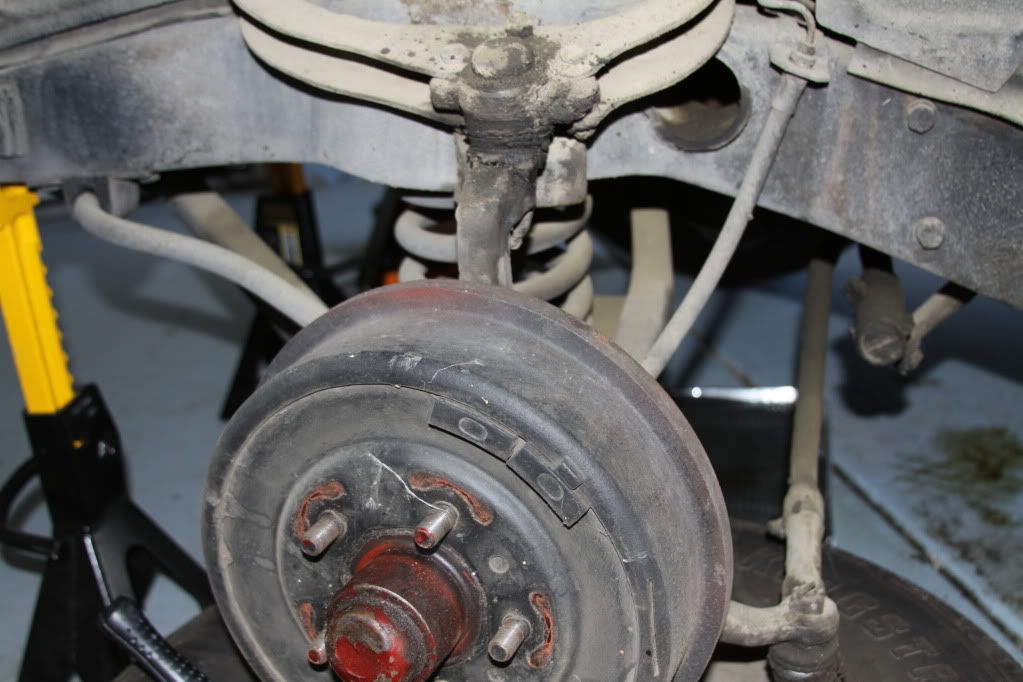
I want to post a warning to all of you that purchase a disc brake kit. Even if they say it comes complete and you dont have to do anything to it. Please pull it apart and check to make sure the bearings are greased. I got bit by this last week and am now in talks with the company to get the parts replaced. So far they have taken responsibility for it and are working with me and have told me they are getting the parts together to send to me in the mail.
Here you can see the washer and rotor are not flush
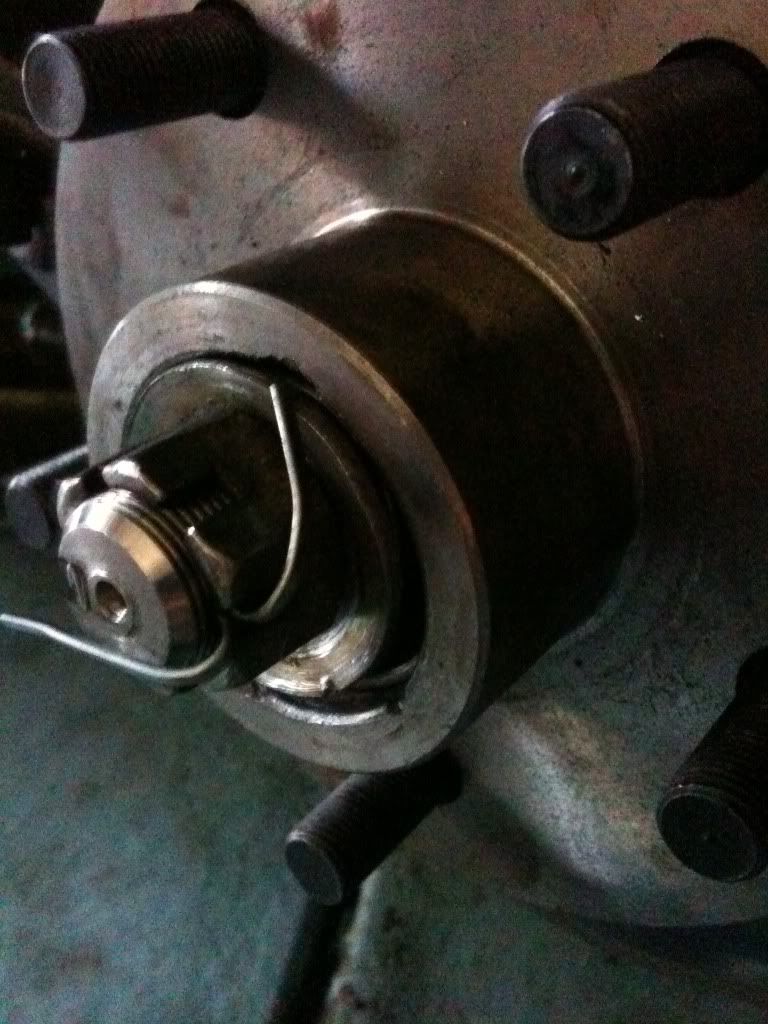
These are what is left of the bearings
The spindle all ground up and what is left of the bearing housing

Here you can see the washer and rotor are not flush
These are what is left of the bearings
The spindle all ground up and what is left of the bearing housing
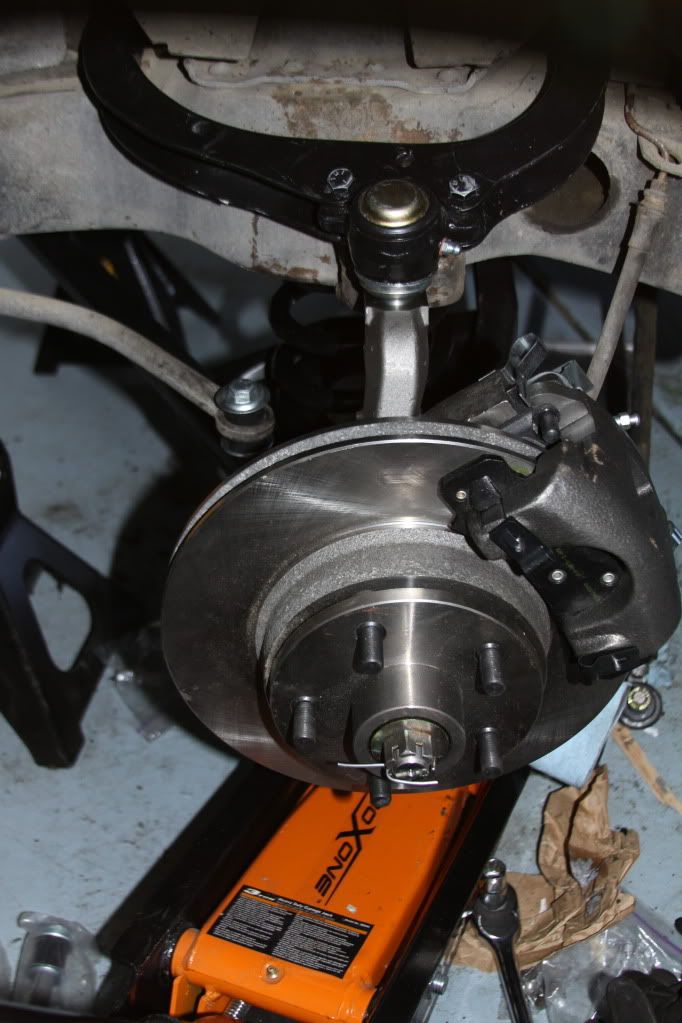
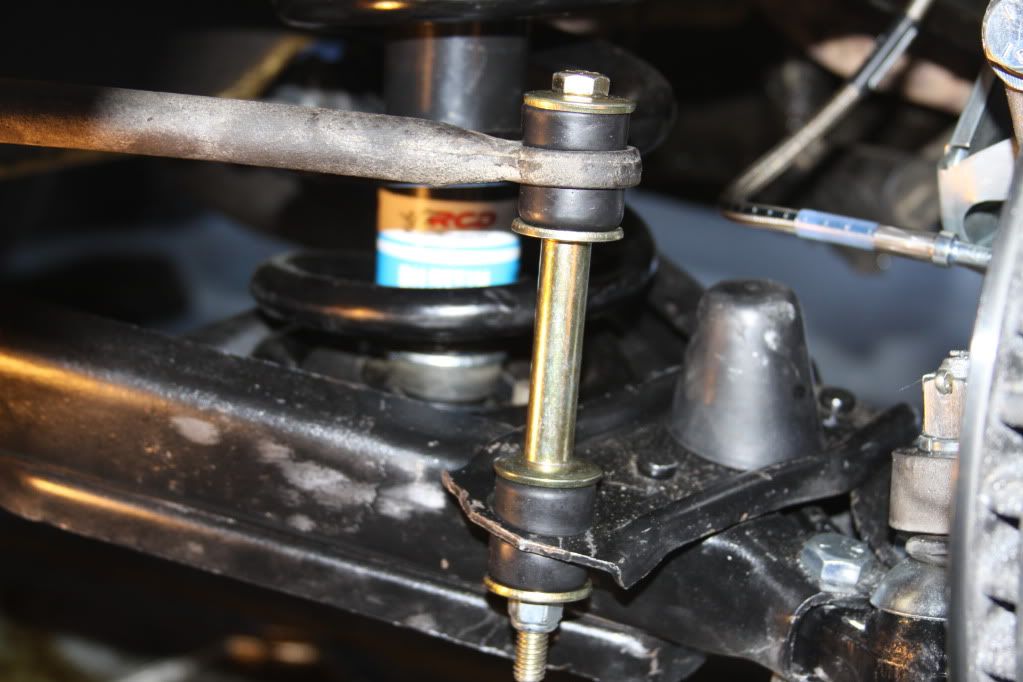
How to reinstall the front suspension
How to tear down the front suspension
The fist thing I would like to outline is how to remove the drum/spindle from the a-arms. This will work best especially if you plan on junking the old drum/spindle. I tried the ol-pickle fork routine and found this to be much easier.
1. Knock lug nuts loose, get the front end on jack stands and remove the tire.
2. Remove the cotter pins from the upper and lower ball joints along with one on the tie rod.
3. Remove the bolts from the tie rod and the upper and lower ball joints where it attaches to the spindle.
4. Knock the tie rod free from the lower a-arm.
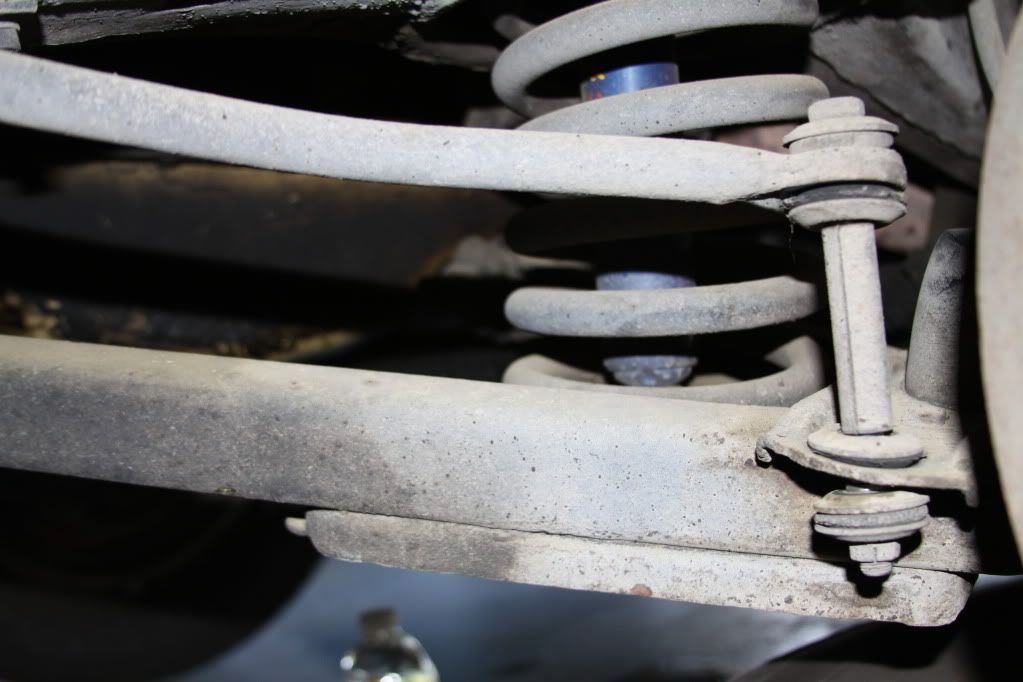
5. Remove the bolt attached to the sway bar.
6. On the lower a-arm remove the nut attached to the lower bump stop, remove the bump stop and then replace the bump stop so it will come out easily again.
7. Remove the nuts attached to the two bolts on the lower ball joint. You will not be able to remove the bolts at this point. The spindle is in the way.
8. Place the floor jack under the lower a-arm and jack it up just enough to support the lower a-arm.
9. Remove the two nuts and bolts from the upper a-arm
10. Remove the upper bump stop. You will need to jack up the floor jack to give you enough space to remove the bump stop. Lower the jack stand back down to where it was in step 8
11. Pull on the upper ball joint to remove it from the a-arm and tilt the drum/spindle forward.
12. You will see that there is enough room to knock out the two bolts on the lower ball joint
13. Once the bolts are removed then pull the lower bump stop out while support the drum/spindle. Then pull the drum/spindle towards you and free from the lower a-arm
14. Carefully unbolt and remove the two bolts holding the shock in place at the bottom.
15. Remove the upper bolt from the shock and drop it down and remove it
16. Standing in front of the car slowly lower the a-arm until the floor jack is all of the way down.
17. If the spring still has some pressure to it. Take the floor jack and raise the front of the car up some more. You will be able to raise it enough to re-leave all of the pressure on the spring and be able to safely remove it.
18. Remove the two bolts on the lower a-arms on the inside.
19. Knock the bolt free on the side closest to the bumper of the car.
20. You can know remove the lower a-arm. Leave the other bolt in place. It is a pain to get out and then replace.
21. Open up the hood.
22. On the upper a-arm you will see a cross bar attached to the frame with two nuts on the outside of the a-arm. Remove those nuts first.
23. Remove the bolts from the cross bar attaching it to the frame. you can know remove the upper a-arm
There you have it the easiest way I have found to disassemble the front suspension on these 54 Fords.
1. Knock lug nuts loose, get the front end on jack stands and remove the tire.
2. Remove the cotter pins from the upper and lower ball joints along with one on the tie rod.
3. Remove the bolts from the tie rod and the upper and lower ball joints where it attaches to the spindle.
4. Knock the tie rod free from the lower a-arm.
5. Remove the bolt attached to the sway bar.
6. On the lower a-arm remove the nut attached to the lower bump stop, remove the bump stop and then replace the bump stop so it will come out easily again.
7. Remove the nuts attached to the two bolts on the lower ball joint. You will not be able to remove the bolts at this point. The spindle is in the way.
8. Place the floor jack under the lower a-arm and jack it up just enough to support the lower a-arm.
9. Remove the two nuts and bolts from the upper a-arm
10. Remove the upper bump stop. You will need to jack up the floor jack to give you enough space to remove the bump stop. Lower the jack stand back down to where it was in step 8
11. Pull on the upper ball joint to remove it from the a-arm and tilt the drum/spindle forward.
12. You will see that there is enough room to knock out the two bolts on the lower ball joint
13. Once the bolts are removed then pull the lower bump stop out while support the drum/spindle. Then pull the drum/spindle towards you and free from the lower a-arm
14. Carefully unbolt and remove the two bolts holding the shock in place at the bottom.
15. Remove the upper bolt from the shock and drop it down and remove it
16. Standing in front of the car slowly lower the a-arm until the floor jack is all of the way down.
17. If the spring still has some pressure to it. Take the floor jack and raise the front of the car up some more. You will be able to raise it enough to re-leave all of the pressure on the spring and be able to safely remove it.
18. Remove the two bolts on the lower a-arms on the inside.
19. Knock the bolt free on the side closest to the bumper of the car.
20. You can know remove the lower a-arm. Leave the other bolt in place. It is a pain to get out and then replace.
21. Open up the hood.
22. On the upper a-arm you will see a cross bar attached to the frame with two nuts on the outside of the a-arm. Remove those nuts first.
23. Remove the bolts from the cross bar attaching it to the frame. you can know remove the upper a-arm
There you have it the easiest way I have found to disassemble the front suspension on these 54 Fords.
Subscribe to:
Posts (Atom)